hunter fan instruction manual
Hunter Fan Instruction Manual: A Comprehensive Guide
Welcome! This manual provides detailed guidance for installing, operating, and maintaining your Hunter ceiling fan, ensuring years of reliable comfort and performance.
Understanding Your Hunter Fan
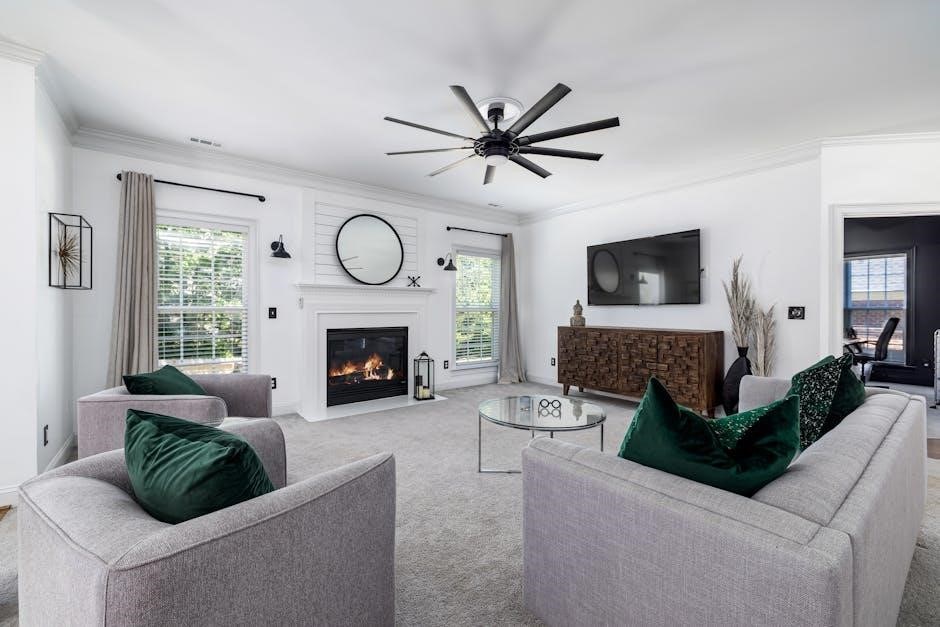
Familiarization is key! Your Hunter ceiling fan is a sophisticated appliance designed for both air circulation and aesthetic enhancement. Before beginning installation or operation, take a moment to understand its core components. These typically include the motor housing, fan blades, downrod (for standard mount fans), mounting bracket, pull chains (if equipped), and a remote receiver (for remote-controlled models).
Model Specifics Matter: Different Hunter fan models feature varying designs and functionalities. Identifying your specific model is crucial for accessing the correct installation instructions and replacement parts. The date code, usually found on a sticker atop the motor housing for downrod fans or on the mounting bracket for low-profile fans, indicates the manufacturing date. Knowing this helps determine compatibility with available resources and potential warranty coverage. Refer to the Hunter Fan Help Centre at Hunterfan.com for detailed assistance.
Identifying Your Hunter Fan Model
Locate the model number, often found on stickers affixed to the motor housing or mounting bracket, for accurate part identification and support.
Locating the Model Number
Finding your Hunter fan’s model number is the crucial first step when seeking replacement parts, accessing specific documentation, or contacting customer support. Typically, you’ll discover this vital identifier on a sticker directly attached to the fan’s motor housing. For down rod mount fans, carefully inspect the top of the motor housing; a mirror might be helpful if the fan is already installed.
Low Profile fans present a slightly different scenario – the model number sticker is usually located on the ceiling mounting bracket. Again, a mirror can be invaluable for visibility during inspection. Be aware that some older models may have multiple stickers; prioritize the one clearly labeled with “Model No.” or similar phrasing. The model number is a unique alphanumeric code that distinguishes your fan from all others, ensuring you receive the correct assistance and components.
Decoding the Date Code
Understanding your Hunter fan’s date code helps determine its manufacturing date, which can be useful for warranty claims or identifying potential compatibility issues with replacement parts. The date code is typically found on the same sticker as the model number, located either on the motor housing (for down rod models) or the ceiling mounting bracket (for low profile fans).
While the exact format can vary, the date code generally represents the year and week of manufacture. It’s often a four-digit number, with the first two digits indicating the year and the last two representing the week. For example, “2605” would signify the 5th week of 2026. This information is invaluable when contacting Hunter Fan support or ordering parts, ensuring you receive components specifically designed for your fan’s production timeframe.
Installation Instructions

Carefully follow these steps to safely and correctly install your Hunter fan, ensuring optimal performance and preventing potential hazards during operation.
Down Rod Mount Fans
For down rod mount fans, begin by securely attaching the mounting bracket to the ceiling’s electrical box, verifying it’s rated to support the fan’s weight. Carefully thread the fan wires through the down rod, then connect the down rod to the fan motor housing, ensuring all screws are tightened appropriately.
Gently lift the fan assembly and hang it on the mounting bracket hook, freeing your hands for wiring connections. Connect the wires according to the color coding – typically black to black (hot), white to white (neutral), and green or bare copper to green (ground).
Once wired, carefully slide the canopy up to cover the mounting bracket and secure it. Remember to locate the date code sticker on the top of the fan body for future reference, as this aids in identifying parts and warranty information.
Low Profile Fans
Installing a low profile fan differs slightly from down rod models. Begin by securely attaching the mounting bracket directly to the ceiling’s electrical box, ensuring it’s appropriately rated for the fan’s weight. Carefully connect the fan wires to the house wiring, following the standard color-coding: black to black, white to white, and green/bare copper to green.
Gently tuck the wires into the electrical box and align the fan motor housing with the mounting bracket. Secure the fan using the provided screws, ensuring a snug and stable fit.
Crucially, for low profile fans, the date code sticker is typically located on the ceiling mounting bracket itself, not on the fan body. This information is vital for identifying your model and accessing support or replacement parts through Hunterfan.com’s Help Centre.
Operating Your Hunter Fan
Enjoy effortless control! Utilize the pull chains for basic speed and light adjustments, or explore the convenience of remote control functionality if equipped.
Using the Pull Chains
Traditional Control: Hunter fans often feature pull chains for straightforward operation. Typically, one chain controls the fan’s speed – pulling it cycles through low, medium, high, and off settings. A separate chain manages the integrated light fixture, allowing you to turn the light on or off, and sometimes adjust its brightness if your model supports dimming functionality.
Understanding the Cycle: Remember that each pull of the chain doesn’t simply toggle a setting; it cycles through all available options. For example, if the fan is on high and you pull the speed chain once, it will move to off. To return to a specific speed, you may need to pull the chain multiple times.
Gentle Operation: Avoid yanking the chains forcefully, as this could damage the internal mechanisms. A gentle, deliberate pull is all that’s needed for reliable operation. Familiarize yourself with the chain functions to enjoy comfortable airflow and illumination.
Remote Control Operation
Convenient Control: Many modern Hunter fans include a remote control for enhanced convenience. These remotes typically offer control over fan speed (low, medium, high, and off), light operation (on/off, dimming), and sometimes even specialized functions like a “breeze” mode that simulates natural wind patterns.
Pairing the Remote: If your remote isn’t responding, it may need to be paired with the fan receiver. Consult your specific model’s instructions for the pairing process, which usually involves turning the fan’s power off and on while pressing a specific button on the remote.
Battery Replacement: Ensure the remote has fresh batteries for optimal performance. Replace batteries when the range decreases or the buttons become unresponsive. Refer to your remote’s battery compartment for the correct battery type. Enjoy effortless control of your Hunter fan from anywhere in the room!
Maintenance and Troubleshooting
Keep it Running Smoothly: Regular cleaning, blade balancing, and addressing minor issues will ensure your Hunter fan operates efficiently and quietly for years.
Cleaning Your Hunter Fan
Dusting is Key: Regularly cleaning your Hunter fan prevents dust buildup, which can affect performance and balance. Before cleaning, always turn off the fan and disconnect the power supply at the breaker box to ensure safety. Use a soft cloth or a duster specifically designed for ceiling fans to gently wipe down the blades, motor housing, and light fixtures.
Blade Cleaning: For stubborn dirt, slightly dampen the cloth with a mild cleaning solution – avoid harsh chemicals or abrasive cleaners, as these can damage the finish. You can also use a pillowcase to cover each blade and gently wipe along its length, catching the dust inside the case. This method minimizes dust scattering.
Motor Housing & Accents: Pay attention to the motor housing and any decorative accents. Wipe these surfaces with a clean, damp cloth. For metal finishes, a metal polish can be used sparingly to restore shine. Remember to dry all components thoroughly after cleaning to prevent moisture damage.
Balancing the Fan Blades
Addressing Wobble: If your Hunter fan wobbles, it’s often due to uneven blade weight distribution. Balancing kits, typically included with your fan, contain weights that can be applied to the blades to correct this. Begin by turning the fan on and observing which blade appears to be the lowest.
Using the Balancing Kit: Attach the clip from the balancing kit to the trailing edge of the suspected blade, midway between the blade tip and the motor. Turn the fan on again and observe if the wobble improves. If it worsens, move the clip to a different blade and repeat the process.
Fine-Tuning: Once you identify the problematic blade, experiment with the weight’s position along the blade’s length until the wobble is minimized. Secure the weight permanently with the adhesive provided. If wobble persists, repeat the process with additional weights if necessary.
Addressing Common Issues
Fan Doesn’t Start: First, verify the power supply – check the circuit breaker and ensure the wall switch is on. If using a remote, confirm the batteries aren’t depleted. Inspect wiring connections within the fan housing, ensuring they are secure. A faulty pull chain switch could also be the culprit.
Humming Noise: A slight hum is normal, but excessive noise may indicate loose screws or components. Tighten all visible screws, particularly those securing the motor housing and blade irons. Ensure the blades aren’t contacting the housing.
Remote Not Working: Replace the remote’s batteries. Ensure there’s no interference from other electronic devices. Re-synchronize the remote with the fan receiver following the instructions in the operating section of this manual.
Finding Replacement Parts
Need a replacement? Visit Hunterfan.com, navigate to the Help Centre, and select “Replacement Parts and Owners Manual” for assistance.
Hunter Fan Help Centre
Accessing Support: The Hunter Fan Help Centre is your primary online resource for all things related to your ceiling fan. Located directly on the Hunterfan.com website, this comprehensive portal offers a wealth of information designed to assist you with everything from identifying your specific fan model to locating necessary replacement parts and accessing detailed owner’s manuals.
Navigating the Centre: To reach the Help Centre, simply click on the “Help Centre” link prominently displayed in the top menu bar of the Hunter Fan website. A convenient drop-down menu will then appear, presenting you with a variety of options tailored to your needs. Among these options, you’ll find a dedicated section specifically for “Replacement Parts and Owners Manual,” streamlining the process of finding what you require.
Resources Available: Within the Help Centre, you can expect to find frequently asked questions, troubleshooting guides, installation videos, and detailed diagrams to aid in the maintenance and repair of your Hunter fan. This centralized hub ensures you have easy access to the support you need, whenever you need it.
Identifying Parts
Essential for Maintenance: Accurately identifying the components of your Hunter ceiling fan is crucial for successful repairs, replacements, and general maintenance. Hunter fans consist of numerous parts, each playing a vital role in the fan’s operation. These include the motor housing, fan blades, blade irons (or blade holders), the downrod (for downrod-mounted fans), the canopy, the light kit (if applicable), and various hardware components like screws and wire connectors.
Utilizing Resources: The Hunter Fan Help Centre provides detailed exploded diagrams and parts lists for most fan models. These diagrams visually illustrate each component and its corresponding name, making identification straightforward. When ordering replacement parts, having the model number readily available is essential, as parts are often model-specific.
Locating Stickers: Refer to the fan’s motor housing; stickers often detail part numbers or provide clues to the fan’s configuration. Remember to consult the owner’s manual for a comprehensive parts list tailored to your specific Hunter fan model.
Safety Precautions
Prioritize Safety: Always disconnect power before installation or maintenance. Ensure blades are securely attached and observe all electrical codes for safe operation.
Electrical Safety
Crucial Electrical Guidelines: Before commencing any work on your Hunter fan, always disconnect the power supply at the circuit breaker or fuse box. This is paramount to prevent electrical shock and ensure your safety. Verify the power is off using a non-contact voltage tester.
Ensure all electrical connections adhere to local and national electrical codes. Improper wiring can create a fire hazard or damage the fan’s motor. If you are uncomfortable working with electrical wiring, consult a qualified electrician.
Never use damaged or frayed wiring. Replace any compromised wires immediately. Grounding the fan properly is essential for safety; follow the grounding instructions provided in the installation manual. Avoid overloading the circuit with other appliances.
Double-check all screw terminals are tightened securely to prevent loose connections.

Blade Safety
Prioritizing Blade Security: Regularly inspect the fan blades for any signs of damage, such as cracks, warping, or looseness. Damaged blades can detach during operation, posing a significant safety risk. Tighten all blade screws periodically to maintain a secure connection to the blade holders.
Maintain a safe distance between the rotating blades and any surrounding objects, including furniture, curtains, and light fixtures. A minimum clearance of 18 inches is generally recommended. Never attempt to stop the blades manually while the fan is running.
Ensure the blade holders are securely attached to the motor housing. If a blade holder is damaged, replace it immediately with a genuine Hunter replacement part. Avoid modifying the blades in any way, as this can affect their balance and stability.
Keep children and pets away from the operating fan.
Warranty Information
Protect Your Investment! Hunter fans come with a warranty against manufacturing defects; register your fan promptly to validate coverage details.
Registering Your Fan
Secure Your Warranty Benefits! Registering your Hunter ceiling fan is a crucial step to activate and validate your warranty coverage. This simple process ensures you’re eligible for support should any manufacturing defects arise during the warranty period. To register, visit Hunterfan.com and navigate to the “Help Centre” located in the top menu bar.
From the dropdown menu, select “Replacement Parts and Owners Manual.” You’ll be directed to a page where you can input your fan’s model number and date code – information typically found on a sticker affixed to the fan’s motor housing (for downrod models) or the ceiling mounting bracket (for low-profile fans).
Accurate information is key! Double-check your entries before submitting the registration form. Keep a record of your confirmation for future reference. Registering your fan demonstrates ownership and streamlines any potential warranty claims, providing peace of mind and safeguarding your investment.
Understanding Coverage
Your Hunter Fan Warranty: A Detailed Overview. Hunter offers varying warranty periods depending on the fan model and components. Generally, the warranty covers defects in materials and workmanship for a specified duration from the date of purchase. This typically includes the motor, but may not extend to finishes, blades, or light kits, which often have shorter coverage terms.
The warranty does not cover damage resulting from improper installation, misuse, accidents, or alterations. It’s vital to retain your proof of purchase (receipt) as verification of the purchase date. Warranty claims usually require returning the defective part to Hunter or an authorized service center.
Review the complete warranty details, specific to your fan model, on the Hunterfan.com website or within the documentation included with your product; Understanding the scope of your coverage ensures a smooth process should you ever need to utilize your warranty benefits.