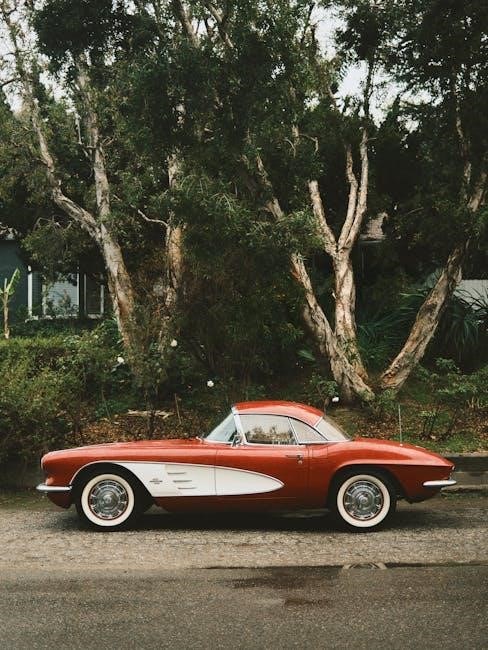
corvette c6 manual
The Corvette C6 manual transmission offers precise control, enhancing performance and handling. Known for its smooth shifting, it complements the V8 engine’s power delivery;
Owners praise the six-speed manual for its engaging driving experience, making it a favorite among enthusiasts. However, common issues like voltage drops and clutch fluid problems exist.
Regular fluid checks and maintenance are crucial to ensure optimal functionality. The C6 manual remains a testament to the Corvette’s legacy, blending power with driver connection.
1.1 Overview of the Corvette C6
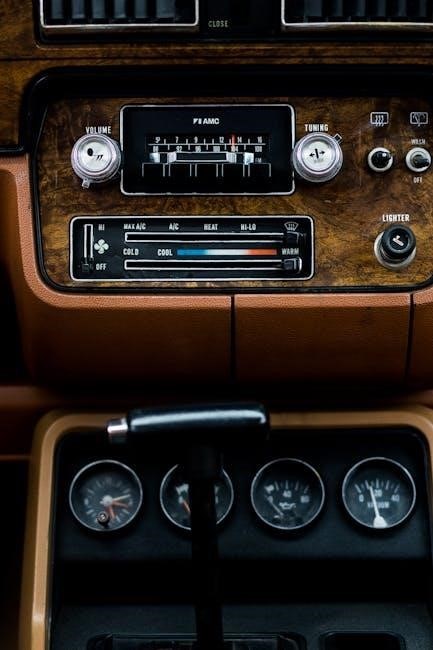
The Corvette C6, produced from 2005 to 2013, is a sixth-generation model known for its sleek design and powerful performance. It features a rear-engine layout with a V8 powertrain, delivering exceptional acceleration and handling. The C6 manual transmission, specifically the six-speed Tremec TR6060, provides precise control and enhances the driving experience. Owners often praise its smooth shifting and responsiveness, making it a favorite among enthusiasts. However, common issues like voltage drops and clutch fluid problems have been reported, requiring regular maintenance to ensure optimal performance.
1.2 Importance of the Manual Transmission in the C6
The manual transmission in the Corvette C6 is integral to its driving dynamics, offering precise control and driver engagement. It enhances acceleration and handling, making the C6 a track-ready vehicle. Enthusiasts value the six-speed manual for its responsiveness and connection to the car’s performance. Regular maintenance, such as fluid checks and clutch inspections, is essential to uphold its functionality. The manual transmission remains a key feature that distinguishes the C6 as a driver-focused sports car, cherished by Corvette enthusiasts worldwide.
Corvette C6 Manual Transmission Features
The C6 manual transmission features a six-speed design with smooth shifting and precise control. It enhances driver engagement and performance, making it a standout feature for enthusiasts.
2.1 Six-Speed Manual Transmission Overview
The Corvette C6’s six-speed manual transmission provides a smooth and responsive driving experience. It features a precise gear ratio, enabling optimal acceleration and control. The transmission is designed for both everyday driving and high-performance scenarios.
With a focus on durability, the six-speed manual is built to handle the power of the C6’s V8 engine, offering a perfect blend of power delivery and driver engagement.
2.2 Key Features of the C6 Manual Transmission
The C6 manual transmission offers smooth shifting and precise control, enhancing the driving experience. It features a robust design, optimized gear ratios, and a user-friendly clutch system. The six-speed setup ensures excellent acceleration and responsiveness, making it ideal for both everyday driving and performance scenarios. Additionally, the transmission’s durability and reliability are well-regarded, providing long-term satisfaction for Corvette enthusiasts.

Driving the Corvette C6 Manual
Driving the C6 manual delivers a responsive and engaging experience, with smooth shifting and precise control. It balances performance and everyday usability, offering exhilarating acceleration and handling.
3.1 Driving Experience with the Six-Speed Manual
The Corvette C6 manual offers a dynamic driving experience, with smooth shifting and precise control. The six-speed manual transmission enhances connectivity to the road, making every drive engaging. Its responsive nature allows for quick acceleration and seamless gear transitions, ideal for both urban commutes and spirited drives. Owners often highlight the manual’s ability to balance power and handling, providing a thrilling yet manageable ride. This makes the C6 a standout choice for enthusiasts seeking a hands-on driving experience.
3.2 Tips for Optimal Performance
For optimal performance, monitor voltage levels to prevent drops, as this can affect transmission functionality. Regular fluid checks and clutch maintenance are essential to ensure smooth shifting. Use the correct driving mode for your situation, such as “Accessories” mode for neutral shifts. Avoid aggressive downshifting and maintain smooth acceleration to preserve the transmission’s longevity. These practices enhance the driving experience and maintain the C6 manual’s reliability and performance over time.
Engaging with owner forums can also provide tailored advice for specific driving conditions.

Maintenance and Care for the Corvette C6 Manual
Regular fluid checks and inspections are vital. Monitor clutch fluid levels and replace as needed. Ensure proper transmission operation by addressing voltage drops promptly for smooth shifting.
4.1 Fluid Check and Replacement
Regular fluid checks are essential for the Corvette C6 manual transmission. Inspect clutch fluid levels and condition, as low or contaminated fluid can affect performance. Replace clutch fluid every 30,000 miles or as needed. Additionally, check transmission fluid levels and top off if necessary. Ensure proper fluid viscosity for optimal shifting smoothness. Addressing voltage drop issues is also critical, as they can impact transmission operation. Always use high-quality, synthetic fluids for longevity and reliability.
4.2 Clutch Maintenance and Inspection
Clutch maintenance is vital for the Corvette C6 manual. Inspect the clutch pedal for smooth operation and proper engagement. Check the slave and master cylinders for leaks or wear. Replace worn-out components promptly to prevent failure. Bleed the clutch system if air enters, ensuring precise control. Regularly inspect the clutch disc and pressure plate for wear. Addressing these issues early ensures smooth shifting and prevents costly repairs. Always refer to the manual for specific maintenance intervals and procedures.

Common Issues with the Corvette C6 Manual
The C6 manual often experiences voltage drops and clutch fluid issues. Regular inspections and maintenance are crucial to prevent these problems and ensure smooth operation.
5.1 Voltage Drop Issues in C6 Corvettes
Voltage drop issues in C6 Corvettes are common, often causing electrical system malfunctions. Drivers may notice the voltage dropping from 14V to as low as 9V, especially in traffic.
This can trigger dashboard warnings and accessory failures. A short-term fix involves putting the car in Accessory mode. Permanent solutions require inspecting the wiring harness and alternator for faults.
Community advice suggests checking the starter relay and connections. Regular electrical system maintenance is crucial to prevent recurring voltage drop problems.
5.2 Clutch Fluid Problems and Solutions
Clutch fluid problems in the C6 Corvette are common, often due to degradation over time. This can lead to a spongy pedal feel and shifting difficulties. Regular inspection and replacement are essential to maintain smooth operation.
Solutions include flushing the system with synthetic brake fluid and inspecting the clutch master and slave cylinders for leaks or wear. Addressing these issues promptly ensures optimal performance and prevents further damage to the transmission system.
Performance of the Corvette C6 Manual
The C6 Corvette manual delivers exceptional performance, with the six-speed transmission enhancing driver engagement. It achieves impressive acceleration and a top speed of over 180 mph.
The manual gearbox optimizes power delivery, making it a thrilling experience for enthusiasts, while maintaining the Corvette’s reputation for balance between speed and handling.
6.1 Acceleration and Top Speed
The Corvette C6 manual delivers impressive acceleration, with the base model reaching 0-60 mph in just 4.2 seconds. The Z06 variant achieves an even faster 3.4 seconds.
The six-speed manual enhances driving dynamics, offering precise control over gear shifts. With a top speed exceeding 180 mph, the C6 manual combines power with agility, making it a standout performer on both road and track.
6.2 Handling and Dynamics
The Corvette C6 manual excels in handling, offering a balance of power and precision. Its rear-wheel-drive layout and well-tuned suspension provide exceptional cornering stability and responsiveness.
The six-speed manual transmission enhances driver engagement, allowing for seamless control during acceleration and braking. With precise steering and a firm chassis, the C6 manual delivers a thrilling driving experience, making it a standout performer on winding roads and tracks alike.

Buyer’s Guide for the Corvette C6 Manual
When purchasing a C6 Corvette with a manual transmission, inspect the clutch fluid and transmission for wear. Check for recently replaced or serviced components to ensure reliability.
Set a budget of up to $30,000 for models like the Grand Sport or Z06. Consider market value and long-term maintenance costs for the best deal.
7.1 What to Look for When Purchasing a C6 Corvette
When buying a C6 Corvette with a manual transmission, inspect the clutch fluid for cleanliness and check for any signs of wear or leakage in the system.
Look for recently replaced or serviced components, such as the starter relay or transmission mounts, to ensure reliability and avoid future repairs.
Be cautious of voltage drop issues, which can affect electrical systems, and ensure all fluids, including engine oil, are clean and free of debris.
A pre-purchase inspection is highly recommended to identify potential problems early.
7.2 Budget Considerations and Market Value
The C6 Corvette manual typically ranges between $25,000 and $40,000, depending on mileage and condition. Budget around $30,000 for a well-maintained model.
Automatic versions are more common, but manuals hold their value better due to enthusiast demand. Allocate extra funds for potential repairs, such as clutch replacements or fluid system overhauls.
Long-term, the C6 manual is considered a solid investment, especially for collectors, as its legacy and performance capabilities continue to attract buyers.
Corvette C6 Manual vs. Automatic
The C6 Corvette offers a choice between a six-speed manual and an automatic transmission. The manual provides better driver engagement and control, appealing to enthusiasts.
The automatic, while convenient, sacrifices some precision and connection, making it more suited for daily driving comfort rather than performance-oriented use.
8.1 Comparison of Manual and Automatic Transmissions
The Corvette C6 manual transmission offers precise control and a more engaging driving experience, making it ideal for enthusiasts seeking hands-on performance.
In contrast, the automatic transmission prioritizes convenience and ease of use, with smooth gear shifts suited for daily driving and traffic scenarios.
While the manual enhances acceleration and driver connection, the automatic provides a more relaxed experience, making it a practical choice for everyday use.
Both options cater to different preferences, with the manual appealing to purists and the automatic to those valuing comfort and simplicity.
8.2 Pros and Cons of Each Transmission Type
- Manual Transmission Pros: Precise control, better acceleration, and a more engaging driving experience. Costs less to maintain and repair compared to automatics.
- Manual Transmission Cons: Requires manual shifting, which can be less convenient in heavy traffic. Not ideal for new drivers due to the learning curve.
- Automatic Transmission Pros: Easier to drive, especially in urban settings, with smooth gear transitions. Reduces driver fatigue on long journeys.
- Automatic Transmission Cons: Less control over gear shifts, slightly higher cost, and often heavier than manual transmissions.
Both options cater to different driving preferences, with manual appealing to enthusiasts and automatic suiting everyday convenience.

Corvette C6 Manual Transmission Repair
Diagnosing and addressing issues like voltage drops and clutch fluid problems is crucial. Regular checks on components such as starter relays can prevent major repairs;
Professional expertise may be needed for complex fixes, ensuring the transmission’s longevity and performance.
9.1 Common Repairs and Replacement Costs
Common repairs for the C6 manual include addressing voltage drop issues, replacing clutch master cylinders, and fixing faulty starter relays. Costs vary, with clutch replacements ranging from $500 to $1,000 and transmission seals around $300. Electrical component fixes, like starter relays, are typically more affordable at $50 to $200. Fluid leaks and worn synchronizers may require more extensive work, potentially costing upwards of $1,500. Regular maintenance can help mitigate these issues, ensuring the transmission’s longevity and performance.
9.2 DIY vs. Professional Repair Advice
DIY repairs for the C6 manual can save costs but require mechanical aptitude. Simple fixes like fluid changes or clutch inspections are manageable at home. However, complex issues such as transmission disassembly or electrical troubleshooting often demand professional expertise. Professionals ensure precise repairs, preventing further damage. For novices, seeking guidance from forums or repair manuals is advisable. Balancing cost and skill level is key to deciding between DIY and professional repair paths for optimal results and vehicle longevity.
Corvette C6 Manual Transmission Upgrades
Upgrading the C6 manual transmission enhances performance with lightweight components and improved gearing. Aftermarket parts boost durability and acceleration, making it ideal for racing and high-performance driving.
10.1 Performance Upgrades for the Manual Transmission
Performance upgrades for the C6 manual transmission include lightweight flywheels, high-performance clutches, and short-throw shifters. These modifications enhance acceleration and reduce wear. Installing a performance-oriented gear set can improve both acceleration and top speed, catering to track enthusiasts. Upgraded components ensure smoother shifting and increased durability, making the C6 manual transmission even more responsive and reliable for high-performance driving experiences.
10.2 Aftermarket Components and Modifications
The C6 manual transmission can be enhanced with aftermarket components like upgraded shift kits, bearings, and synchros. Lightweight aluminum driveshafts and performance axles reduce rotational mass, improving power delivery. Carbon-fiber clutch kits offer superior grip and durability for high-performance applications. Additionally, aftermarket pedals and shifters provide a more precise feel, enhancing driver control. These modifications not only boost performance but also extend the transmission’s lifespan, making it ideal for track use and competitive racing environments.

Corvette C6 Manual Transmission History
The C6 generation marked a significant milestone, being the first Corvette to achieve over 200 mph stock. Its manual transmission evolved from earlier models, refining performance.
11.1 Evolution of the Manual Transmission in Corvettes
The manual transmission in Corvettes has evolved significantly since its introduction. Early models featured simple, robust designs, while later generations incorporated advanced features like six-speed gearboxes. The C5 introduced the Tremec T56, which carried over to the C6 with refinements.
The C6’s six-speed manual became synonymous with precise shifting and durability, catering to both performance and everyday driving. Its evolution reflects Chevrolet’s commitment to balancing power delivery with driver engagement, solidifying the manual transmission’s role in Corvette history.
11.2 Significance of the C6 in Corvette History
The Corvette C6 holds a special place in history as a bridge between tradition and modernity. It introduced advancements like a hydroformed frame and a 6.0L V8, while retaining the manual transmission’s heritage.
The C6 was the first Corvette to achieve 200 mph in its base form, marking a milestone in performance. Its enduring popularity and timeless design solidified its legacy as a pivotal generation in Corvette history.

Corvette C6 Manual Transmission in Racing
The C6’s six-speed manual excels in racing, offering precise control and quick shifts. Its durability under high-stress conditions makes it a favorite among track enthusiasts.
Racers praise the manual for its direct connection to the engine, enhancing responsiveness and lap times, proving its value in competitive driving environments.
12.1 Racing Performance of the C6 Manual
The Corvette C6 manual transmission excels in racing environments, delivering precise control and rapid shifting. Its smooth operation and responsiveness make it ideal for track driving, where every millisecond counts.
The six-speed manual enhances acceleration and handling, allowing drivers to fully utilize the V8 engine’s power. Racers often praise its durability and direct feel, making it a preferred choice for competitive driving.
The C6 manual’s performance capabilities solidify its reputation as a capable racing machine, blending power with driver connection for an unforgettable track experience.
12.2 Track Experience with the Six-Speed Manual
The C6’s six-speed manual delivers an exhilarating track experience, offering drivers precise control and seamless shifts. Its intuitive design allows for quick gear changes, maximizing acceleration and handling on the circuit.
Owners and racers highlight the transmission’s responsiveness, which enhances the connection between driver and car. The manual transmission’s reliability under high-stress conditions further cements its reputation as a track-ready performer.
Whether navigating tight corners or accelerating down straights, the C6 manual transmission provides a dynamic and engaging driving experience tailored for the racecourse.

Corvette C6 Manual Transmission Community
The C6 manual transmission fosters a strong community of owners who share experiences, tips, and resources. Forums and discussions highlight the camaraderie among enthusiasts.
13.1 Owner Experiences and Feedback
Owners of the Corvette C6 manual often praise its engaging driving experience and precise control. Many share their experiences online, highlighting the satisfaction of shifting gears and the connection to the road.
Feedback frequently mentions the smoothness of the six-speed manual, though some note common issues like voltage drops and clutch fluid problems. Forums and communities are filled with tips and solutions, fostering a strong sense of camaraderie among enthusiasts.
13.2 Forums and Resources for C6 Manual Owners
Forums like Corvette Forum and Corvette Action Center are invaluable for C6 manual owners, offering expert advice and troubleshooting tips. These platforms provide detailed guides on maintenance, upgrades, and common fixes, fostering a supportive community for enthusiasts.
Resources include technical guides, DIY tutorials, and real-world experiences shared by owners. These forums are essential for resolving issues like voltage drops and clutch fluid problems, ensuring owners can keep their C6 manuals performing optimally.
Corvette C6 Manual Transmission Future Prospects
The C6 manual’s collectibility grows as enthusiasts seek classic driving experiences. Modernization efforts and meticulous upkeep ensure its relevance, making it a timeless choice for Corvette purists.
14.1 Collectibility and Long-Term Value
The Corvette C6 manual is gaining traction among collectors due to its blend of performance and nostalgic appeal; As fewer modern cars offer manual transmissions, the C6’s six-speed becomes increasingly desirable. Its historical significance and the joy of driving it contribute to long-term value growth. Proper maintenance and low mileage enhance its collectibility, making it a smart investment for Corvette enthusiasts seeking a classic yet modern sports car experience.
14.2 Modernization and Upkeep of the C6 Manual
Modernizing the C6 manual involves upgrading components like clutch kits and gearsets for enhanced performance. Regular fluid changes and inspections ensure longevity. Addressing common issues like voltage drops and clutch fluid leaks is crucial. Aftermarket modifications can improve shifting precision and durability. Proper upkeep not only maintains functionality but also preserves the transmission’s value. Owners benefit from a supportive community and resources for DIY repairs, ensuring the C6 manual remains a reliable and enjoyable driving experience for years to come.

Corvette C6 Manual Transmission Conclusion
The Corvette C6 manual offers a thrilling driving experience, combining performance with precision. Its durability and enthusiast appeal make it a timeless choice for drivers seeking connection.
15.1 Final Thoughts on the C6 Manual
The Corvette C6 manual stands out for its engaging driving experience, offering precise control and exhilarating performance. While it requires attentive maintenance, its durability and timeless appeal make it a favorite among enthusiasts. Owners often highlight the satisfaction of manual shifting, which enhances the connection between driver and car. Despite occasional issues like voltage drops and clutch fluid problems, the C6 manual remains a testament to Chevrolet’s commitment to blending power with driver engagement.
15.2 Recommendations for Potential Buyers
Prospective buyers should prioritize inspecting the clutch and transmission fluid, as these are common maintenance points. Ensure the vehicle’s history includes regular servicing to prevent costly repairs. Test driving is essential to assess shifting smoothness and overall performance. Budgeting for potential upgrades, like aftermarket components, can enhance both functionality and driving experience. With proper care, the C6 manual offers lasting value and unforgettable driving memories, making it a worthwhile investment for Corvette enthusiasts.