manual irrigation system
Manual irrigation systems are cost-effective solutions for water delivery, ideal for small-scale applications. They offer precise control over water distribution, promoting conservation and efficient plant growth.
1.1 Definition and Purpose
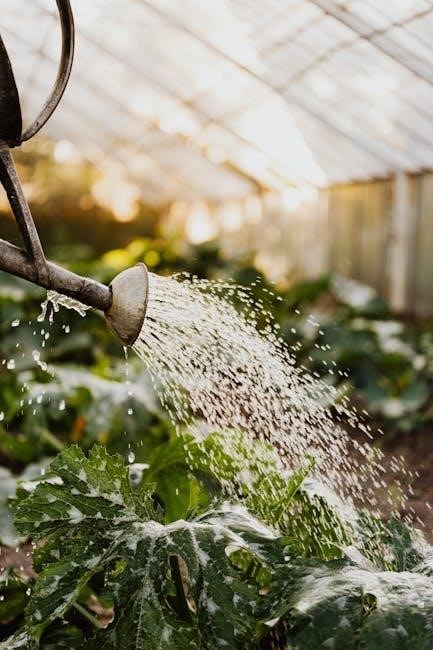
A manual irrigation system is a non-automated method of delivering water to plants, relying on human operation to control flow. Its primary purpose is to supply water efficiently, reducing waste and ensuring plants receive adequate hydration. These systems are often simple, cost-effective, and ideal for small-scale applications, such as gardens or farms. They promote water conservation by allowing precise control over distribution, making them a sustainable choice for growers seeking to optimize resources while maintaining healthy plant growth.
1.2 Importance in Water Conservation
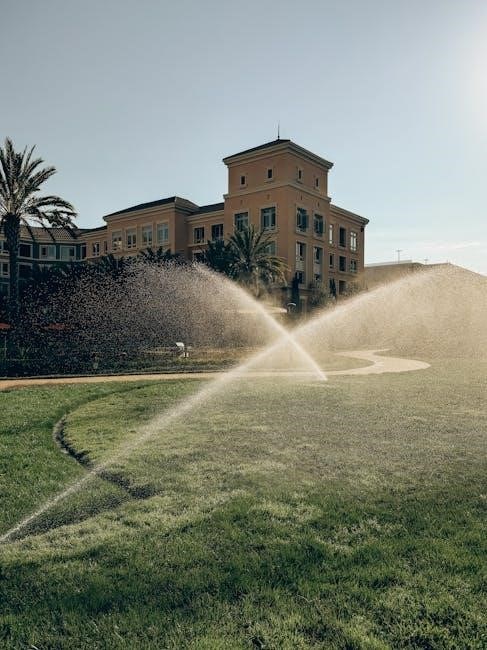
Manual irrigation systems play a crucial role in water conservation by enabling precise control over water distribution. They minimize runoff and evaporation, ensuring water is delivered directly to plant roots. This method promotes sustainable water use, especially in regions with limited resources. By allowing users to apply water only where needed, manual systems help reduce waste and optimize water efficiency, making them a valuable tool in conservation efforts and environmentally friendly farming practices.
1.3 Brief History and Evolution
Manual irrigation systems trace their origins to ancient civilizations, where people used buckets and canals to water crops. Over time, advancements in materials like clay pipes and bamboo improved efficiency. In the 20th century, PVC pipes and connectors revolutionized manual systems, making them durable and accessible. These systems have evolved to balance tradition with modern needs, offering sustainable solutions for water delivery. Their simplicity and effectiveness have ensured their continued use alongside technological advancements, proving adaptable to various agricultural and residential applications worldwide.
Components of a Manual Irrigation System
A manual irrigation system includes a water source, tubing, connectors, and valves. These components work together to deliver water efficiently to plants, ensuring optimal growth and conservation.
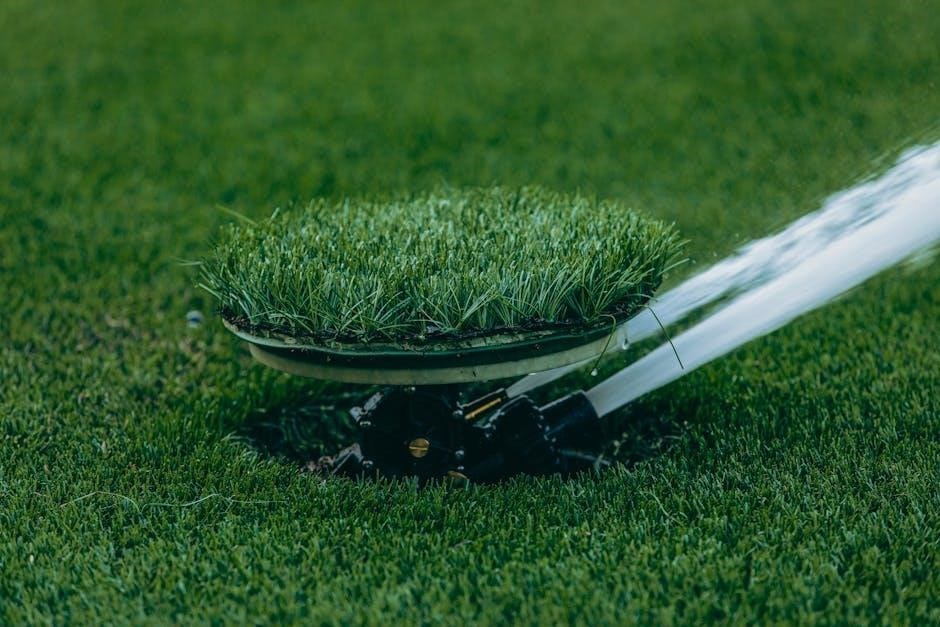
2.1 Water Source and Distribution
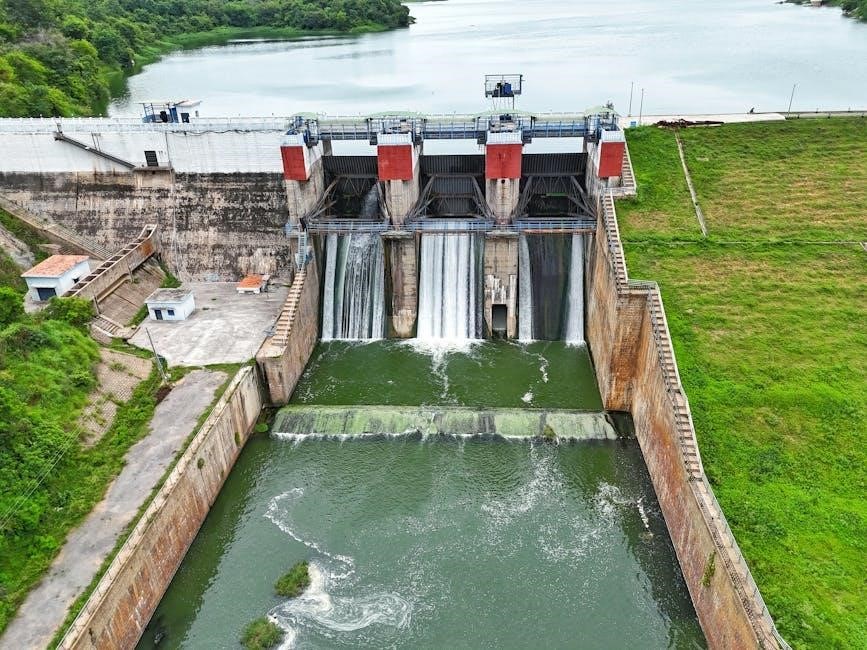
A reliable water source is essential for manual irrigation systems, such as wells, rainwater tanks, or municipal supplies. Distribution involves delivering water evenly across the field or garden. Proper planning ensures efficient water flow through pipes, hoses, or canals. Using high-quality tubing, like PVC pipes, minimizes leaks and maintains pressure. Manual systems often rely on gravity or pumps for water distribution, ensuring plants receive adequate hydration without waste. Regular maintenance of the water source and distribution channels is crucial for system longevity and performance.
2.2 Tubing and Pipes
Tubing and pipes are critical components of manual irrigation systems, ensuring water flows efficiently from the source to plants. PVC pipes are recommended for durability and resistance to UV light. Flexible hoses, like the yellow hose mentioned, are suitable for occasional watering but may not be as reliable for long-term use. Proper installation and maintenance of tubing and pipes prevent leaks and blockages. Regular inspections are essential to address cracks or damage, ensuring the system operates effectively and conserves water.
2.3 Connectors and Fittings
Connectors and fittings are essential for creating a leak-proof and efficient manual irrigation system. They link tubing, pipes, and valves, ensuring water flows smoothly. Common types include barbed connectors, push-fit couplers, and threaded fittings. Durable materials like PVC or brass are recommended for longevity and corrosion resistance. Proper installation of connectors ensures system reliability and prevents water loss. Selecting the right fittings is crucial to maintain water pressure and flow rates, making the system both functional and sustainable for long-term use.
2.4 Valves and Controls
Valves and controls are vital components of manual irrigation systems, enabling precise water flow regulation. Manual valves, such as gate or ball valves, allow users to control water distribution effectively. These components are typically durable, with materials like brass or PVC ensuring long-lasting performance. Proper installation of valves enhances system efficiency, while regular maintenance prevents leaks and malfunctions. They provide flexibility in managing water supply, making manual irrigation systems adaptable to various watering needs and scenarios, ensuring optimal water usage and plant care.
Design and Planning
Effective design ensures manual irrigation systems operate efficiently, balancing water distribution and plant needs. Proper planning considers water sources, layout, and future expansion, optimizing resource use and flexibility.
3.1 Assessing Water Needs
Assessing water needs involves evaluating soil type, plant requirements, and climate conditions. Understanding these factors ensures efficient irrigation scheduling. Soil moisture levels and plant water demands vary, requiring precise measurements. Climate data, such as rainfall and evaporation rates, helps determine irrigation frequency. Manual systems allow for tailored watering, reducing waste and optimizing resource use. Regular monitoring ensures plants receive adequate hydration without overwatering, promoting healthy growth and water conservation. This step is crucial for system design and long-term sustainability. Accurate assessment prevents waterlogged soil and nutrient leaching, ensuring plants thrive in their environment.
3.2 Layout and Mapping
Creating a detailed layout and map is essential for a manual irrigation system. Start by identifying the water source and plant locations. Sketch the area, marking zones based on water needs and plant types. Plan tubing routes to ensure even coverage, avoiding obstacles. Include valve placements for easy control. Use graph paper or digital tools for accuracy. Consider future expansions to adapt the system. A clear map helps visualize water flow, ensuring efficient distribution and minimizing waste. Proper planning prevents overwatering and ensures all plants receive adequate hydration.
3.3 Considerations for Expansion
When planning for future expansion, consider scalability in your manual irrigation system. Assess potential areas for growth and additional components needed, such as extra tubing or valves. Ensure the current layout allows for easy integration of new zones without disrupting existing operations. Choose materials and designs that can accommodate upgrades, like adaptable connectors. Plan for increased water demand and pressure requirements. Regularly review and update the system map to reflect changes. Flexibility in design ensures the system can grow efficiently, meeting future needs without major overhauls, thus saving time and resources.
3.4 Drainage and Recycling
Proper drainage and recycling are essential for maintaining efficiency and reducing waste in manual irrigation systems. Incorporate drainage points to prevent waterlogging and ensure excess water returns to the source or a storage tank for reuse. Consider using rainwater collection systems to supplement your water supply. Recycling water reduces the demand on external sources and minimizes environmental impact. Regularly inspect drainage pathways to prevent clogs and ensure smooth operation. Implementing these practices promotes sustainability and cost-effectiveness, making your irrigation system more eco-friendly and resource-efficient over time.
Installation Steps
Installing a manual irrigation system involves preparing the site, laying tubing, connecting components, testing the setup, and securing the system for long-term efficiency and durability.
4.1 Preparing the Site
Before installing a manual irrigation system, the site must be prepared thoroughly. Clear the area of debris, rocks, and vegetation to ensure smooth installation. Level the ground to prevent water pooling and uneven distribution. Mark the layout of the irrigation components, such as tubing and valves, to align with your design plan. Check for underground utilities or obstructions that may interfere with the system. Proper site preparation ensures efficient installation and optimal performance of the manual irrigation system.
4.2 Laying Out the Tubing
Laying out tubing requires careful planning to ensure even water distribution. Start by mapping the system based on plant needs and water source location. Mark the ground with stakes or flags to guide placement. Roll out the tubing, ensuring it follows the planned path without kinking. Secure it with clips or weights to prevent movement. For larger systems, consider elevated sections to maintain water pressure. Finally, test the layout by running water to identify and fix any leaks or blockages before final installation;
4.3 Connecting Components
Connecting components requires precision to ensure a leak-free system. Use Teflon tape or pipe dope on threaded fittings for a watertight seal. Attach couplers and adapters to connect tubing sections, ensuring they are snug and aligned. Install valves by threading them into the system, making sure they are accessible for operation. For PVC pipes, apply primer and cement to secure connections. Test each joint by gently tugging on the tubing to ensure stability. Proper connections are crucial for system efficiency and longevity, preventing future leaks and blockages.
4.4 Testing the System
After installation, thoroughly test the manual irrigation system to ensure functionality. Turn on the water supply slowly and inspect all connections for leaks. Check each valve to confirm proper operation and water flow direction. Verify that water reaches every plant or area evenly. Address any blockages or kinks in tubing immediately. Test system performance under full pressure to identify weak points. Record observations to make necessary adjustments, ensuring optimal water distribution. Proper testing prevents future issues and guarantees efficient irrigation.
4.5 Securing and Protecting the System
Secure the manual irrigation system by anchoring components firmly to prevent movement. Use protective sleeves or covers for exposed tubing and pipes to shield them from weather and pests. Ensure all connections are tightly sealed and reinforced with clamps or tape. Winterize the system by draining water and insulating vulnerable parts. Regularly inspect for wear and tear, replacing damaged sections promptly. Proper protection extends the system’s lifespan and maintains its efficiency, ensuring reliable water delivery for plants and crops throughout the growing season.
Maintenance and Upkeep
Regular cleaning, winterization, and inspections are vital for manual irrigation systems. Protecting components from damage ensures longevity and optimal water delivery efficiency throughout the growing season.
5.1 Regular Cleaning
Regular cleaning is essential for maintaining the efficiency and longevity of manual irrigation systems. Flush the system periodically to remove dirt and debris. Clean filters and screens to ensure proper water flow. Inspect tubing and pipes for mineral buildup or blockages. Use mild detergents or vinegar solutions for stubborn stains or scaling. Regular maintenance prevents clogs and contamination, ensuring optimal water distribution. Schedule cleaning sessions during dry seasons or after prolonged use to keep the system functioning smoothly and effectively.
5.2 Winterization
Winterization is crucial to protect manual irrigation systems from freezing temperatures. Drain all water from tubing and pipes to prevent ice formation. Disconnect and store components like hoses and nozzles indoors. Use air compressors to blow out remaining water from the system. Insulate exposed pipes and valves in unheated areas. Apply protective covers to prevent frost damage. Regular winterization extends the system’s lifespan and ensures it operates efficiently when spring arrives. Proper preparation avoids costly repairs and maintains water flow integrity for the next growing season.
5.3 Inspecting for Damage
Regular inspections are vital to identify and address damage in manual irrigation systems; Check tubing, pipes, and connectors for cracks, punctures, or wear. Look for signs of leaks, corrosion, or blockages that could reduce water flow. Inspect valves and fittings for proper function and tightness. Use visual checks and tools like air compressors to test for hidden issues. Addressing damage promptly prevents further deterioration and ensures the system operates efficiently. Regular maintenance extends the lifespan of the system and maintains optimal water distribution.
Troubleshooting Common Issues
Identify leaks, blockages, and low water pressure issues promptly. Check for malfunctioning valves and address connectivity problems to ensure efficient water distribution and system longevity.
6.1 Leaks and Blockages
Leaks and blockages are common issues in manual irrigation systems, often caused by loose connections, damaged tubing, or debris buildup. Inspecting pipes and fittings regularly can help identify leaks early. Tightening connectors and replacing worn-out parts are effective solutions. For blockages, flushing the system or cleaning filters can restore water flow. Preventative measures, such as using high-quality materials and shielding pipes from pests, reduce the likelihood of these problems. Addressing leaks and blockages promptly ensures efficient water distribution and system longevity.
6.2 Low Water Pressure
Low water pressure in manual irrigation systems can reduce efficiency and coverage. Common causes include narrow tubing, blockages, or an insufficient water source; Checking tubing size and ensuring proper installation can help resolve pressure issues. Additionally, verifying the water supply’s strength and eliminating kinks in pipes are effective solutions. Regular maintenance, such as clearing debris and inspecting valves, can prevent pressure drops. Addressing low pressure promptly ensures optimal water distribution and system performance, maintaining healthy plant growth and resource efficiency.
6.3 Malfunctioning Valves
Malfunctioning valves can disrupt irrigation efficiency, causing uneven water distribution or system shutdowns. Common issues include worn-out seals, mineral buildup, or debris clogging valve openings. Regular inspection and cleaning can prevent such problems. Replacing damaged seals or entire valves may be necessary. Proper installation and maintenance are key to ensuring valves function optimally. Addressing valve issues promptly helps maintain consistent water flow and system performance, reducing the risk of plant stress due to inadequate watering.
Water Conservation Tips
Adopt efficient watering practices, use rainwater collection systems, and reduce evaporation by irrigating during cooler hours. Soil type and plant needs should guide water usage.
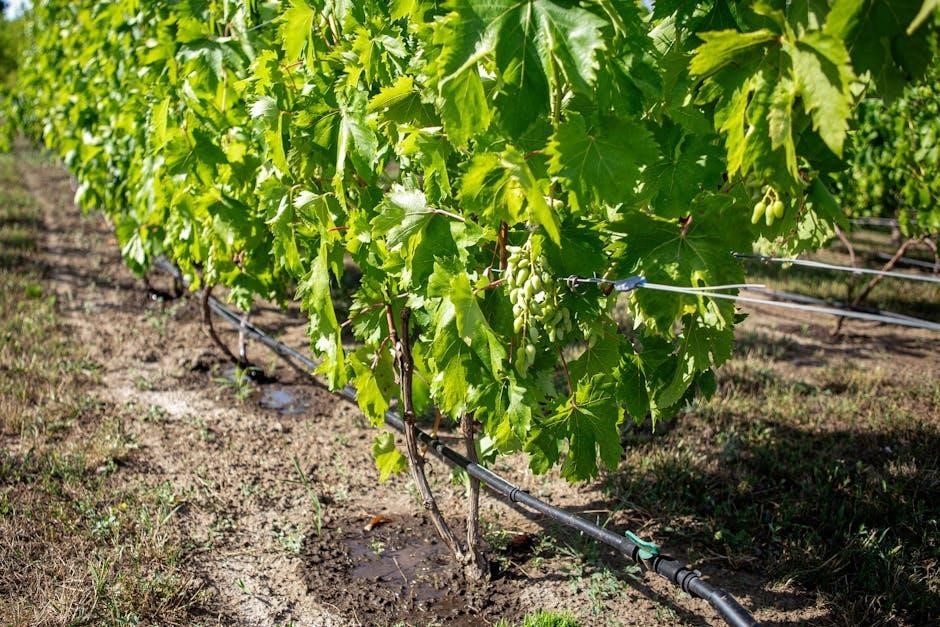
7.1 Efficient Watering Practices
Efficient watering practices are crucial for maximizing water use in manual irrigation systems. Water plants during early morning or late evening to minimize evaporation. Avoid overwatering by checking soil moisture beforehand. Use drip irrigation or soaker hoses to deliver water directly to roots, reducing runoff. Apply water in intervals to allow proper absorption. Adjust watering schedules based on weather conditions and plant needs. This ensures healthy growth while conserving water effectively.
7.2 Using Rainwater
Using rainwater in manual irrigation systems is a sustainable and cost-effective practice. It reduces reliance on groundwater and lowers water bills. Rainwater is naturally rich in nutrients and has a neutral pH, making it ideal for plants. Collecting rainwater in storage tanks and redirecting it to irrigation lines ensures a steady supply during dry periods. Proper filtration systems can enhance water quality, preventing debris from clogging tubing. This method aligns with water conservation goals and supports efficient watering practices, especially in small-scale applications.
7.3 Reducing Evaporation
Reducing evaporation is crucial for maximizing water efficiency in manual irrigation systems. Mulching soil surfaces creates a protective layer, minimizing direct sunlight exposure and slowing water loss. Shading plants during peak sun hours or using reflective covers can also reduce evaporation. Additionally, precise irrigation techniques, such as drip systems or soaker hoses, deliver water directly to roots, limiting surface evaporation. Watering during cooler morning or evening hours further conserves water. These strategies ensure optimal water use and healthier plant growth, aligning with conservation goals and sustainable practices.
Cost and Budgeting
Manual irrigation systems are cost-effective, with initial investments in PVC pipes and fittings offering long-term savings through efficient water use and reduced maintenance needs.
8.1 Initial Investment
Setting up a manual irrigation system typically requires an initial investment in components like PVC pipes, connectors, and valves. These materials are cost-effective and durable, making the system affordable for small-scale applications. While the upfront cost is relatively low, it’s important to budget for all necessary parts to ensure proper functionality. Compared to automatic systems, manual irrigation often has a lower initial expense, making it a budget-friendly option for homeowners and small farms. Labor costs may add up over time, but the system’s simplicity can lead to long-term savings.
8.2 Long-Term Savings
Manual irrigation systems offer significant long-term savings due to their energy efficiency and low maintenance requirements. Without the need for automated controls or timers, operational costs are minimized. The durability of materials like PVC pipes reduces the need for frequent replacements, further cutting expenses. Additionally, manual systems allow for precise water control, reducing waste and lowering water bills. Over time, these savings can offset the initial investment, making manual irrigation a cost-effective solution for sustainable water management in both residential and small-scale agricultural settings.
8.4 DIY vs. Professional Installation
DIY installation of manual irrigation systems can be cost-effective for small-scale projects, allowing homeowners to save on labor costs. However, professional installation is recommended for larger or more complex setups, ensuring efficiency and proper system design. DIY enthusiasts can find guidance online, while professionals bring expertise in optimizing water distribution and minimizing future maintenance. Balancing budget and complexity helps determine the best approach, whether tackling the project independently or hiring experienced contractors for a reliable setup.
Manual vs. Automatic Systems
Manual systems offer simplicity and cost-effectiveness, relying on human operation, while automatic systems provide convenience and efficiency through programmed controls, suited for larger or more complex irrigation needs.
9.1 Pros and Cons
Manual irrigation systems offer cost-effectiveness and simplicity, making them ideal for small-scale use. They provide precise water control, reducing waste and promoting water conservation. However, they require frequent manual intervention, which can be labor-intensive. While they are easy to install and maintain, they may not be suitable for large areas due to scalability limitations. Despite these drawbacks, their ability to adapt to specific watering needs makes them a practical choice for many users.
9.2 Suitability for Different Scenarios
Manual irrigation systems are versatile, suiting small residential gardens, commercial landscapes, and agricultural fields. Residential applications benefit from simplicity and cost-effectiveness, while commercial settings may require larger, customizable layouts. Public spaces often demand systems that demonstrate clear water conservation value. PVC pipes and manual controls are ideal for small-scale use, whereas automation can enhance efficiency in larger setups. The choice depends on water availability, land size, and specific watering needs, ensuring optimal performance across diverse scenarios.

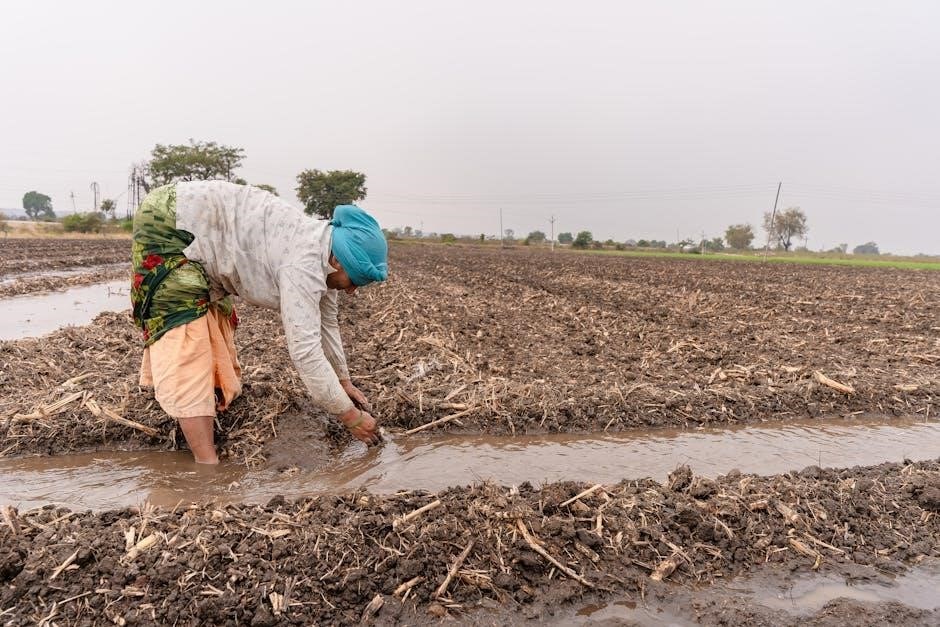
Case Studies and Examples
A small-scale farm in rural Africa successfully implemented a manual irrigation system using PVC pipes and manual controls, significantly reducing water waste and improving crop yields.
10.1 Residential Applications
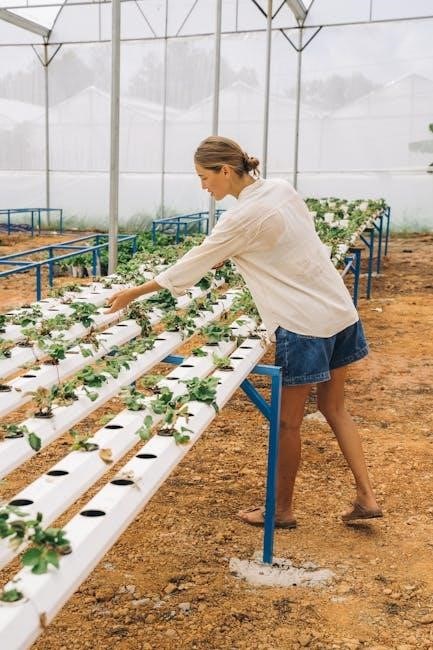
Manual irrigation systems are widely used in residential settings for gardens, yards, and potted plants. Homeowners often prefer these systems due to their simplicity and cost-effectiveness. They allow precise water control, reducing waste and ensuring plants receive adequate moisture. Many residents install PVC pipes or soaker hoses for efficient watering. These systems are particularly popular in small gardens and yards, promoting water conservation while maintaining plant health. They can be easily customized to fit specific landscape needs, making them a practical choice for homeowners seeking sustainable irrigation solutions.
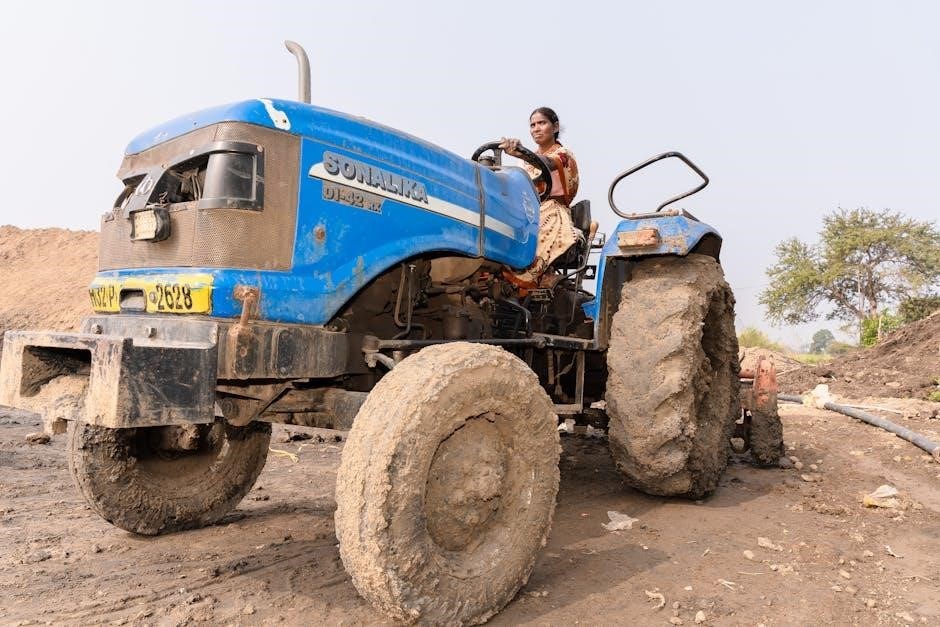
10.2 Commercial and Agricultural Use
Manual irrigation systems are essential in commercial agriculture for efficient water management. PVC pipes and 2-wire systems are commonly used for precise water distribution, reducing waste and ensuring crop health. These systems are cost-effective and scalable, making them ideal for large-scale farming. They allow farmers to control water flow manually, optimizing hydration for row crops, orchards, and other agricultural applications. This method is particularly valuable in water-scarce regions, supporting sustainable farming practices while maintaining productivity and resource efficiency.
Best Practices
Adopt efficient watering schedules, consider soil types, and tailor irrigation to plant needs. Regular system inspections ensure optimal performance and water conservation.
11.1 Timing and Frequency
Proper timing and frequency are crucial for effective manual irrigation. Water plants when the soil feels dry to the touch, typically in the early morning or evening to minimize evaporation. Avoid overwatering, as it can lead to root rot and nutrient leaching. Adjust frequency based on weather conditions and soil type—more often in hot, dry weather and less in cooler, rainy periods. Observing plant responses helps tailor watering schedules for optimal growth and water conservation.
11.2 Soil Type Considerations
Manual irrigation systems must account for soil type, as it affects water absorption and retention. Clay soils retain water longer, requiring less frequent irrigation, while sandy soils drain quickly, needing more consistent watering. Loamy soils balance these traits. Understanding soil composition helps optimize water delivery, preventing overwatering and ensuring plants receive adequate moisture. Proper soil-specific irrigation practices enhance crop health and reduce water waste, making manual systems more efficient and environmentally friendly when tailored to soil conditions.
11.3 Plant Specific Needs
Manual irrigation systems allow customization to meet plant-specific needs, ensuring optimal water delivery. Plants vary in water requirements based on growth stages, rooting depth, and species. For example, seedlings may need frequent, shallow watering, while mature trees require deeper, less frequent irrigation. Understanding these needs enables precise water application, reducing waste and enhancing plant health. Tailoring irrigation schedules to specific plants promotes efficient water use and supports robust growth, making manual systems highly adaptable for diverse gardens or agricultural settings.
Future Trends
Future trends in manual irrigation systems include integration with smart technology for remote monitoring and sustainability innovations, enhancing efficiency and eco-friendly water management practices globally.
12.1 Integration with Smart Technology
Manual irrigation systems are increasingly integrating with smart technology, enhancing efficiency through automation. AI-driven systems optimize watering schedules, reducing waste by adapting to weather conditions and soil moisture levels. IoT devices enable remote monitoring and control, allowing users to manage irrigation via smartphones. Sensors detect water needs in real-time, ensuring precise delivery. This fusion of traditional manual controls with modern tech promotes sustainability and convenience, making manual irrigation systems smarter and more adaptable for future needs.
12.2 Sustainability Innovations
Manual irrigation systems are embracing sustainability through eco-friendly materials and water-saving techniques. Innovations like drip irrigation and rainwater harvesting reduce water waste and energy use. Recyclable tubing and low-flow nozzles minimize environmental impact. Solar-powered pumps and gravity-fed systems further enhance efficiency, lowering carbon footprints. These advancements align with global sustainability goals, making manual irrigation systems a greener choice for both small and large-scale applications. Such innovations ensure resource conservation while maintaining crop health and productivity, fostering a more sustainable future for agriculture and landscaping.