Archive: June 26, 2025

2017 bmw x1 stptrnc manual

The 2017 BMW X1 sDrive20i is a compact luxury SUV featuring a 2.0-liter, 4-cylinder engine with 192 horsepower. It offers a smooth driving experience with its Steptronic transmission, combining automatic convenience and manual mode for enhanced control and precision.

Overview of the 2017 BMW X1 sDrive20i

The 2017 BMW X1 sDrive20i is a compact luxury SUV equipped with a 2.0-liter, 4-cylinder engine producing 192 horsepower. It features an 8-speed Steptronic automatic transmission with Sport and Manual modes, offering a blend of efficiency and dynamic performance. The sDrive20i model is rear-wheel drive, providing precise handling and a responsive driving experience. With its sleek design and advanced features, it combines practicality and luxury, making it a versatile choice for urban and off-road adventures.

Importance of the Owner’s Manual

The owner’s manual for the 2017 BMW X1 sDrive20i is a vital resource for drivers, providing detailed insights into the vehicle’s features, operation, and maintenance. It helps owners understand the advanced technology, including the Steptronic transmission, and ensures safe and efficient driving. The manual also includes troubleshooting tips and maintenance schedules, enabling owners to maximize their driving experience and preserve the vehicle’s performance. Accessible in print or digital formats, it is an essential guide for optimizing the BMW X1’s capabilities.

Engine and Performance

The 2017 BMW X1 sDrive20i features a 2.0-liter, 4-cylinder engine producing 192 horsepower. It delivers a balance of power and efficiency, with an 8-speed Steptronic transmission for smooth acceleration and responsive performance.

Specifications (2.0-liter, 4-cylinder, 192 horsepower)

The 2017 BMW X1 sDrive20i is equipped with a 2.0-liter, 4-cylinder turbocharged petrol engine, delivering 192 horsepower and 206 lb-ft of torque. This powertrain is paired with an 8-speed Steptronic automatic transmission, offering smooth gear shifts and responsive performance. The engine features BMW’s TwinPower Turbo technology, ensuring efficient combustion and dynamic acceleration. With a rear-wheel-drive configuration, it achieves a balance of agility and stability, making it suitable for both urban and highway driving scenarios.

Acceleration and Top Speed

The 2017 BMW X1 sDrive20i accelerates from 0 to 100 km/h in 7.7 seconds, showcasing its responsive performance. With an electronically limited top speed of 240 km/h, it delivers a blend of agility and refinement. The Steptronic transmission optimizes gear shifts, ensuring smooth acceleration and effortless cruising. This combination of power and precision makes the X1 sDrive20i a versatile choice for both urban commutes and highway drives, providing an engaging driving experience.

Transmission

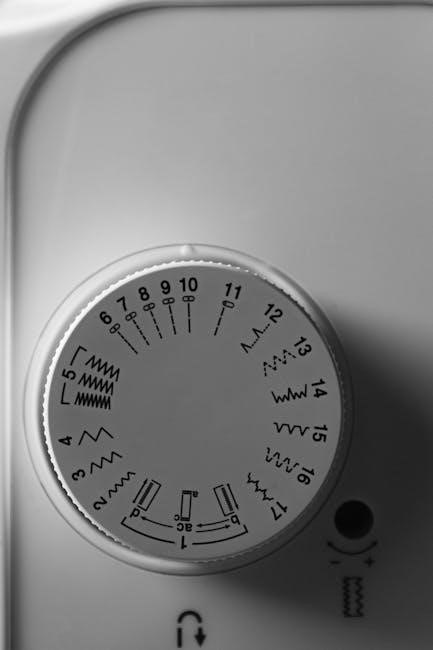
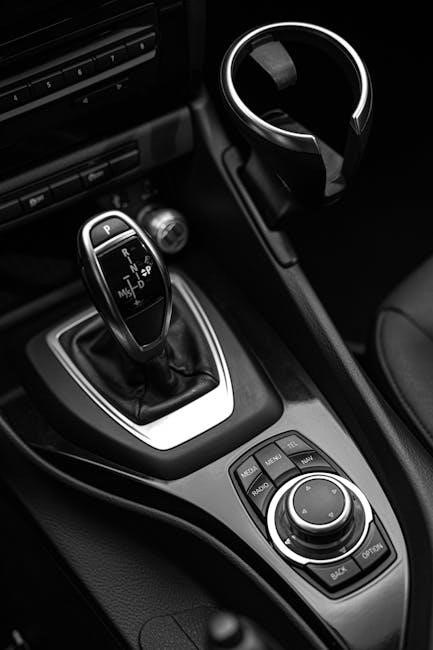
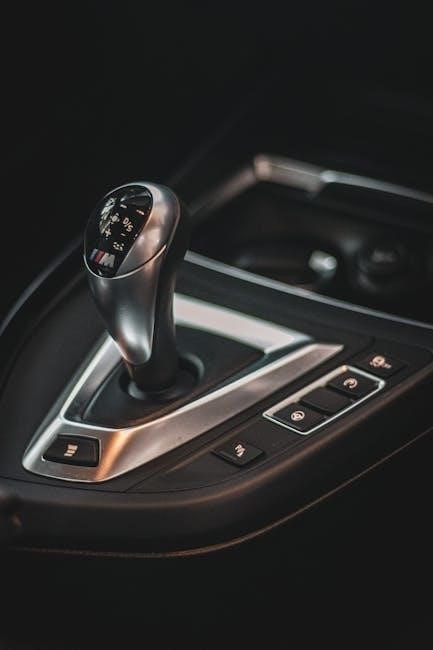
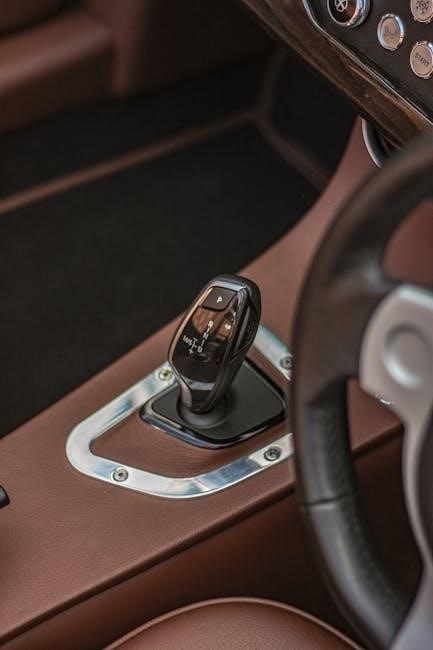
The 2017 BMW X1 sDrive20i features a 7-speed Steptronic automatic transmission with dual-clutch technology, offering smooth gear shifts and responsive performance in both automatic and manual modes.

Manual Mode Operation

The 2017 BMW X1 sDrive20i offers a manual mode operation through its 7-speed Steptronic transmission, providing drivers with precise control over gear shifts. This feature allows for a more engaging driving experience, enabling manual gear changes via the gearshift or steering wheel-mounted paddles. The system retains automatic functionality for convenience but switches to manual control when desired, offering a sporty feel and enhanced responsiveness during spirited driving. This dual-mode capability caters to both everyday comfort and dynamic performance needs.

Automatic Mode and Steptronic Transmission

The 2017 BMW X1 sDrive20i features an advanced 7-speed Steptronic automatic transmission, designed for smooth and seamless shifting. In automatic mode, the system optimizes gear changes for fuel efficiency and performance, adapting to driving conditions. The transmission also includes an Eco mode for enhanced economy and a Sport mode for a more dynamic experience. This dual-clutch design ensures quick and precise shifts, providing a responsive driving experience while maintaining the convenience of automatic operation.

Interior and Features

The 2017 BMW X1 sDrive20i boasts a premium interior with high-quality materials, offering a spacious and comfortable cabin. Features include an intuitive infotainment system, Bluetooth connectivity, and USB ports for seamless integration. The interior design emphasizes luxury and functionality, with optional features like heated seats and a panoramic sunroof enhancing the driving experience.

Infotainment System Overview

The 2017 BMW X1 sDrive20i features an advanced infotainment system with a high-resolution 6.5-inch display. It includes navigation, voice command, and seamless connectivity options like Bluetooth and USB ports. The system supports various audio formats and integrates with smartphones for hands-free functionality. Drivers can access a wide range of entertainment and navigation tools, ensuring a connected and enjoyable driving experience. Optional upgrades include a larger touchscreen and enhanced features for premium convenience.

Comfort and Convenience Features

The 2017 BMW X1 sDrive20i offers a range of comfort and convenience features, including dual-zone automatic climate control, power-adjustable seats with memory settings, and heated seats for added comfort. The multifunction steering wheel provides easy access to controls for audio, cruise control, and phone functions. Additional features like keyless entry, push-button start, and rear park distance control enhance the overall driving experience, ensuring convenience and ease of use for both driver and passengers.

Technology and Connectivity

The 2017 BMW X1 sDrive20i features an advanced iDrive infotainment system with ConnectedDrive Services, BMW Apps, Bluetooth, and USB connectivity, ensuring seamless integration with your devices.

BMW Apps and ConnectedDrive Services

The 2017 BMW X1 sDrive20i integrates BMW Apps and ConnectedDrive Services, offering enhanced connectivity and convenience. These features include real-time traffic updates, voice command functionality, and seamless smartphone integration. Drivers can access apps like BMW Remote Services and ConnectedDrive for remote vehicle control and personalized settings. The system ensures a connected driving experience, combining innovation with ease of use for a safer and more enjoyable journey.

Maintenance and Service

Regular maintenance is crucial for the 2017 BMW X1 sDrive20i to ensure optimal performance and longevity. Scheduled services include oil changes, tire rotations, and inspections to maintain reliability and prevent potential issues. Proper care helps preserve the vehicle’s value and ensures safety on the road. Always refer to the owner’s manual for specific recommendations and guidelines;

Recommended Schedule

The 2017 BMW X1 sDrive20i requires regular maintenance to ensure optimal performance. Oil changes are recommended every 5,000 to 7,500 miles, while tire rotations should be done every 5,000 miles. Brake pads should be inspected every 12,500 miles, and spark plugs replaced every 60,000 miles. The air filter should be changed every 15,000 miles, and the fuel filter every 30,000 miles. Coolant replacement is needed every 50,000 miles, and transmission fluid every 30,000 to 60,000 miles. Adhering to these intervals helps maintain the vehicle’s performance and prevent potential issues. Always consult the owner’s manual for detailed recommendations.

DIY Maintenance Tips

Regular checks and simple DIY tasks can help maintain the 2017 BMW X1 sDrive20i’s performance. Check tire pressure monthly, ensuring it matches the specifications in the owner’s manual. Replace the cabin air filter every 15,000 miles to improve air quality and ventilation. Inspect battery terminals for corrosion and clean them if necessary. Additionally, monitor fluid levels, including oil and coolant, and top them off as needed. Always use BMW-approved parts for replacements to ensure compatibility and longevity.

Safety Features

The 2017 BMW X1 sDrive20i includes advanced safety features like airbags, electronic stability control, and anti-lock braking systems. These technologies enhance driver and passenger protection during emergencies.

Active Safety Technologies

The 2017 BMW X1 sDrive20i features a suite of active safety technologies, including Dynamic Stability Control (DSC), which enhances traction and stability by adjusting engine power and brakes. Additionally, the X1 is equipped with features like Brake Assist and Cornering Brake Control, which improve braking performance in various driving conditions. These systems work seamlessly to provide a safer and more controlled driving experience, ensuring optimal protection for both the driver and passengers.

Passive Safety Features

The 2017 BMW X1 sDrive20i is equipped with a robust suite of passive safety features, including multiple airbags such as front, side, and head airbags for comprehensive occupant protection. The vehicle also features 3-point seatbelts with pre-tensioners and load limiters to ensure optimal restraint during collisions. Additionally, the BMW X1’s reinforced body structure is designed to absorb and distribute crash forces effectively, minimizing the risk of injury. These features work together to provide a high level of safety and protection for all occupants.

Fuel Efficiency

The 2017 BMW X1 sDrive20i delivers EPA-rated fuel efficiency, combining a 2.0-liter engine with an 8-speed automatic transmission and Eco Pro mode for optimized city and highway economy.

EPA Ratings and Driving Modes

The 2017 BMW X1 sDrive20i achieves an EPA-rated fuel economy of 23 mpg in the city, 32 mpg on the highway, and 26 mpg combined. It features an 8-speed Steptronic automatic transmission with Sport and Manual modes, allowing drivers to optimize performance or efficiency. The Eco Pro mode further enhances fuel efficiency by adjusting engine and climate settings for economical driving. These features ensure a balance between power and practicality, making the X1 a versatile choice for daily commuting and long-distance travel.

Exterior Design

The 2017 BMW X1 sDrive20i features a compact, aerodynamic design with refined styling elements. Optional alloy wheels and sport packages enhance its sleek, modern appearance, emphasizing its SUV heritage.

Styling Elements and Options

The 2017 BMW X1 sDrive20i offers a sleek, aerodynamic design with sporty accents. Exterior styling elements include optional alloy wheels, chrome trim, and LED headlights for enhanced visibility. Sport packages add aggressive bumpers and side skirts, while xLine and M Sport trims provide distinct visual identities. Buyers can choose from a range of metallic and non-metallic paint finishes. Optional roof rails and adaptive LED lights further personalize the vehicle’s appearance, blending functionality with luxury aesthetics.

Accessories and Customization

The 2017 BMW X1 offers a variety of accessories and customization options, including alloy wheels, roof rails, and interior trim upgrades. Drivers can enhance functionality and style with tailored add-ons.

Available Accessories

The 2017 BMW X1 offers a range of accessories to enhance functionality and style. These include alloy wheels, roof rails, and storage solutions for added practicality. Additionally, drivers can opt for interior trim upgrades, such as wood or aluminum accents, to personalize the cabin. Exterior styling elements, like front and rear spoilers, are also available to give the X1 a sportier appearance. These accessories allow owners to tailor their vehicle to their preferences, ensuring a unique driving experience.

Customization Options

The 2017 BMW X1 sDrive20i offers various customization options to tailor the vehicle to individual preferences. Drivers can choose from packages like the Sport Design Package or xLine, which enhance the car’s aesthetic appeal with unique bumpers, side skirts, and interior trims. Additionally, interior customization options include choices of upholstery materials and colors, as well as trim finishes such as wood or aluminum. These features allow owners to personalize their X1, ensuring a driving experience that matches their lifestyle and taste.

Comparison with Other Models

The 2017 BMW X1 sDrive20i stands out among competitors with its efficient 2.0-liter engine and responsive Steptronic transmission, offering a blend of performance and fuel efficiency.

Key Differences and Unique Features

The 2017 BMW X1 sDrive20i distinguishes itself with a powerful 2.0-liter, 4-cylinder engine producing 192 horsepower. Its 8-speed Steptronic automatic transmission offers both Sport and Manual modes, ensuring responsive acceleration and precise control. Unlike competitors, it features a rear-wheel-drive layout with optional xDrive all-wheel drive. Fuel efficiency is enhanced through its BS-VI compliance. The X1 also boasts a compact yet spacious design, blending performance with practicality, making it a standout choice in the compact SUV segment.

User Reviews and Feedback

Owners praise the 2017 BMW X1 sDrive20i for its smooth manual transmission and responsive handling. Many highlight its precise steering and sporty driving dynamics, ensuring an engaging experience.

Owner Experiences and Impressions

Owners of the 2017 BMW X1 sDrive20i have shared overwhelmingly positive feedback. They highlight the vehicle’s responsive handling and smooth acceleration, making it a joy to drive. The Steptronic transmission is praised for its seamless shifting, while the manual mode offers a sporty feel. Many appreciate the blend of luxury and performance, noting that the X1 strikes a perfect balance between comfort and agility. Overall, it is a favorite among compact SUV enthusiasts.

Environmental Impact

The 2017 BMW X1 sDrive20i features emission-reducing technologies and eco-friendly driving modes, ensuring compliance with stringent environmental standards while maintaining performance.

Emission Standards and Eco Modes

The 2017 BMW X1 sDrive20i adheres to strict Euro 6 emission standards, ensuring reduced environmental impact. It features eco-friendly driving modes, including an automatic start/stop function and regenerative braking. The Eco Pro mode optimizes fuel efficiency by adjusting engine and transmission settings. These technologies help minimize carbon emissions while maintaining the vehicle’s responsive performance, aligning with BMW’s commitment to sustainability without compromising driving dynamics.

The 2017 BMW X1 sDrive20i combines sporty performance with practicality, featuring a powerful 2.0-liter engine and smooth Steptronic transmission. Its efficient design and eco-friendly modes make it a standout choice for drivers seeking a balanced blend of luxury, power, and sustainability.

Final Thoughts and Recommendations

The 2017 BMW X1 sDrive20i offers a compelling blend of performance, luxury, and practicality, making it a strong contender in the compact SUV segment. Its 2.0-liter engine and Steptronic transmission deliver smooth acceleration and efficient performance. For drivers seeking a manual driving experience, the sDrive20i is an excellent choice, as newer models have shifted to automatic-only options. With its sporty design and advanced features, this model remains a standout for those who value both power and everyday usability.

References

Access the 2017 BMW X1 owner’s manual via the Driver’s Guide app or the Know Your BMW online tool for personalized guidance. Additional resources, including service manuals, are available for download.

Additional Resources and Downloads

For comprehensive guidance, the 2017 BMW X1 owner’s manual is available as a downloadable PDF. Additional resources include the Driver’s Guide app and the Know Your BMW online tool, which provide personalized support. Factory service manuals and repair guides can also be accessed for detailed maintenance instructions. Visit the official BMW website or authorized dealerships for these materials, ensuring optimal use and care of your vehicle.

singer sewing machine 99k instruction manual

This manual provides comprehensive guidance for the Singer 99K sewing machine‚ covering setup‚ operation‚ and maintenance. It ensures optimal performance and safety for sewists of all levels.

Overview of the Singer 99K Sewing Machine

The Singer 99K sewing machine is a durable‚ versatile‚ and user-friendly model designed for a wide range of sewing tasks. Built with an all-metal frame‚ it is known for its reliability and long-lasting performance. Suitable for both beginners and experienced sewists‚ the 99K model is ideal for handling various fabrics‚ from delicate materials to heavy-duty textiles. Its compact design and straightforward operation make it a popular choice for home sewing projects. The machine is part of Singer’s legacy of producing high-quality sewing machines‚ trusted for over 170 years. With its robust construction and ease of use‚ the Singer 99K is a reliable companion for crafting‚ repairs‚ and creative sewing endeavors.

Importance of the Instruction Manual

The Singer 99K instruction manual is an essential guide for optimizing machine performance and ensuring safe operation. It provides clear‚ step-by-step instructions for setting up‚ maintaining‚ and troubleshooting the machine. By following the manual‚ users can prevent damage‚ extend the machine’s lifespan‚ and enhance their sewing experience. The manual also offers valuable insights into maximizing the machine’s features‚ such as stitch selection and tension adjustment. Whether you’re a novice or an experienced sewist‚ the manual serves as a comprehensive resource to unlock the full potential of the Singer 99K. Regularly referring to it ensures that you maintain your machine properly and achieve professional-quality results in every project.

Structure and Content of the Manual

The Singer 99K instruction manual is thoughtfully organized to guide users through every aspect of machine operation. It begins with an introduction‚ followed by safety precautions and detailed descriptions of machine parts. The manual includes step-by-step instructions for setup‚ threading‚ and basic operation‚ as well as advanced features like stitch selection and tension adjustment. Troubleshooting tips and maintenance guidelines are also provided to ensure longevity and optimal performance. Clear diagrams and illustrations accompany the text‚ making complex procedures easier to understand. Whether you’re a beginner or an experienced sewist‚ the manual’s logical structure and comprehensive content ensure you can fully utilize the Singer 99K’s capabilities. Its user-friendly approach makes sewing more enjoyable and efficient.

Safety Precautions and Guidelines

This section outlines essential safety precautions and guidelines to ensure safe operation of the Singer 99K‚ including electrical safety tips and proper machine handling.

General Safety Instructions

Always follow general safety instructions when using the Singer 99K sewing machine. Ensure the work area is clean and well-lit‚ and avoid wearing loose clothing or jewelry that may get caught. Keep children and pets away while operating the machine. Use the machine only for its intended purpose and avoid overclocking; Regularly inspect the power cord and plug for damage. Never touch electrical parts with wet hands‚ and keep the machine away from water. Store the machine in a dry‚ cool place when not in use. Follow all safety guidelines to prevent accidents and ensure safe‚ efficient sewing. Proper maintenance and adherence to these instructions will extend the machine’s lifespan.

Electrical Safety Tips

When using the Singer 99K sewing machine‚ always follow electrical safety tips to prevent hazards. Use the machine only with the voltage specified in the manual‚ and avoid damaged power cords or plugs. Keep the machine away from water to prevent electrical shocks. Never overload circuits or use extension cords that may not support the machine’s power requirements. Unplug the machine when not in use or during maintenance to ensure safety. Avoid touching electrical components with wet hands‚ and never attempt repairs unless you are qualified. Use genuine Singer parts for replacements to maintain electrical integrity. If unsure about any electrical aspect‚ consult a professional. Adhering to these guidelines will help protect you and prolong the machine’s lifespan.

Handling the Machine Safely

Always handle the Singer 99K sewing machine with care to ensure safe operation and longevity. Use both hands to lift the machine‚ as it may be heavier than expected. Avoid touching moving parts‚ such as the needle or bobbin area‚ while the machine is in operation. Keep loose clothing or long hair tied back to prevent accidental entanglement. Ensure the machine is placed on a stable‚ flat surface to avoid tipping. Never leave the machine unattended while it is running‚ especially if children or pets are nearby. Store the machine in a dry‚ cool place when not in use to protect it from damage. By following these guidelines‚ you can ensure safe handling and maintain the machine’s performance over time.

Understanding the Machine: Parts and Accessories

The Singer 99K sewing machine comes with essential accessories like bobbins‚ needles‚ and presser feet. Familiarize yourself with key components such as the bobbin case‚ stitch selector‚ and tension dials for optimal use.

Identifying Key Components of the Singer 99K

Familiarizing yourself with the Singer 99K sewing machine involves understanding its essential parts. The machine features a durable all-metal frame‚ ensuring stability during operation. Key components include the bobbin case‚ needle bar‚ and stitch selector dial‚ which allows for easy switching between various stitch patterns. The tension dials‚ located on the front and side‚ enable precise control over thread tightness. Additionally‚ the presser foot lever is crucial for managing fabric movement‚ while the reverse stitch lever ensures secure seam finishing. Accessories like the zipper foot and buttonhole attachment expand the machine’s versatility. Understanding these components is vital for effective operation and troubleshooting.

Accessories Included with the Machine

The Singer 99K sewing machine comes with a variety of essential accessories to enhance your sewing experience. Included are multiple presser feet‚ such as the all-purpose foot‚ zipper foot‚ and buttonhole foot‚ each designed for specific tasks. A set of high-quality sewing needles is also provided to suit different fabric types. Additionally‚ the machine includes a bobbin case‚ extra bobbins‚ and a seam ripper for correcting mistakes. A hard protective case ensures safe storage and transport of the machine. These accessories complement the machine’s capabilities‚ allowing you to tackle a range of sewing projects with ease and precision. They are designed to be durable and user-friendly‚ supporting your creativity and efficiency.

Understanding Stitch Types and Selection

The Singer 99K sewing machine offers a variety of stitch options to suit different sewing needs. These include straight stitch‚ backstitch‚ and zigzag stitch‚ each designed for specific fabrics and tasks. The straight stitch is ideal for basic sewing and repairing‚ while the backstitch provides reinforcement for seams. The zigzag stitch is perfect for stretchy fabrics and preventing fraying. Additionally‚ the machine features a buttonhole stitch‚ making it easy to create professional-looking buttonholes. Users can select stitches using the machine’s intuitive controls‚ ensuring versatility for various projects. The manual provides clear guidance on choosing the right stitch for your fabric type and sewing goal‚ helping you achieve professional results. By understanding these stitch types‚ you can maximize the machine’s capabilities and enhance your sewing experience. Proper stitch selection is key to achieving desired outcomes in your projects.

Setting Up Your Singer 99K Sewing Machine

Unpack and inspect the machine for damage. Oil and lubricate moving parts as instructed. Thread the machine correctly‚ ensuring proper tension. Insert the bobbin and test stitches. Regular maintenance ensures smooth operation.

Unpacking and Initial Inspection

When you unpack your Singer 99K sewing machine‚ carefully inspect it for any damage or defects. Ensure all accessories‚ such as the power cord‚ needles‚ and bobbins‚ are included. Examine the machine for scratches or dents. Check the stitching and ensure the bobbin case is securely in place. If any parts are missing or damaged‚ contact Singer customer support immediately. This initial inspection ensures your machine is ready for use. Proper setup guarantees safety and optimal performance. Follow the manual’s guidelines for initial checks to avoid future issues. A thorough inspection helps you familiarize yourself with the machine’s components‚ ensuring a smooth sewing experience. Always refer to the manual for specific instructions. Regular checks maintain your machine’s efficiency and longevity. A well-maintained machine provides years of reliable service. Keep the manual handy for quick reference.

Oiling and Lubricating the Machine

Regular oiling and lubrication are essential for the smooth operation of your Singer 99K sewing machine. Use only Singer-recommended oil to prevent damage and ensure optimal performance. Turn off the machine and unplug it before lubricating. Locate the oil holes‚ usually found near the bobbin area or other moving parts. Apply a few drops of oil directly into these holes‚ careful not to over-lubricate. Wipe away any excess oil with a clean cloth to avoid attracting dust. Allow the machine to sit for a few minutes to let the oil distribute evenly. Proper lubrication reduces friction and wear on internal components‚ extending the machine’s lifespan. Always refer to the manual for specific lubrication points and intervals to maintain your Singer 99K in top condition.

Threading the Machine: Step-by-Step Guide

Proper threading is crucial for smooth operation of the Singer 99K sewing machine. Begin by turning off and unplugging the machine for safety. Locate the spool pin and pull the thread through the tension discs‚ ensuring it is seated properly. Next‚ loop the thread around the take-up lever and guide it through the stitch length dial. Finally‚ thread the needle‚ leaving a small tail. Use high-quality thread suitable for your fabric type. Avoid using old or damaged thread‚ as this can cause inconsistencies. Once threaded‚ gently pull the thread to ensure it is taut but not overly tight. Test the machine by sewing a few stitches on scrap fabric to check for proper tension and stitch quality. Always refer to the manual for specific threading diagrams and instructions.

Basic Operation of the Singer 99K

The Singer 99K operates smoothly‚ offering straightforward controls for starting and managing stitches. Selecting the right stitch and using the reverse function enhances your sewing experience.

Starting the Machine and Basic Functions

Starting the Singer 99K is straightforward. Plug in the machine‚ ensure it’s placed on a stable surface‚ and flip the power switch. The motor hums quietly‚ ready for use. Familiarize yourself with the control panel‚ which features stitch selection‚ speed control‚ and the reverse stitch button. Always ensure the machine is properly threaded before sewing. For basic sewing‚ choose the straight stitch or zigzag option‚ depending on your fabric type. The reverse stitch function is ideal for securing seams. Use the handwheel to manually position the needle if needed. The machine’s intuitive design makes it easy to navigate its functions‚ ensuring smooth operation for beginners and experienced sewists alike. Regularly check the bobbin and thread tension for optimal performance.

Selecting the Right Stitch for Your Project

Selecting the right stitch is crucial for achieving professional results with your Singer 99K. The machine offers a variety of stitches‚ including straight‚ zigzag‚ and decorative options. For general sewing‚ the straight stitch is ideal for straight seams‚ while the zigzag stitch is perfect for stretchy fabrics or preventing fraying. Use the decorative stitches for embellishments or unique designs. Always refer to the stitch chart in the manual for guidance. Match the stitch type to your fabric and project needs. Adjusting the stitch length and width ensures proper tension and appearance. Experiment with different stitches on scrap fabric before working on your final project. This ensures the best results and prevents mistakes. The Singer 99K’s stitch selection makes it versatile for various sewing tasks‚ from repairs to creative projects.

Using the Reverse Stitch Function

The Singer 99K sewing machine features a convenient reverse stitch function‚ essential for securing seams. To use it‚ locate the reverse stitch button or lever‚ typically found on the front or side of the machine. Engage the function before sewing to reinforce the start of a seam or at the end to prevent unraveling. This is especially useful for straight stitches. The machine will sew in the reverse direction temporarily‚ creating strong anchor points. Always test the reverse stitch on scrap fabric to ensure proper function. This feature is particularly useful for heavy-duty projects or delicate fabrics. Regularly check the manual for specific instructions tailored to your machine model for optimal results. Proper use of the reverse stitch enhances the durability and finish of your sewing projects.

Advanced Features and Techniques

The Singer 99K offers advanced features like specialized attachments‚ customizable stitch settings‚ and precision tension control‚ enabling users to explore complex sewing techniques with ease and accuracy.

Using Attachments for Specialized Sewing

The Singer 99K sewing machine supports various attachments tailored for specialized tasks‚ such as zippers‚ buttonholes‚ and overlocking. These accessories enhance versatility‚ allowing precise stitching for diverse fabrics and projects. Users can easily switch between attachments‚ ensuring professional-quality results in home sewing. The manual provides step-by-step guidance for each attachment‚ making it easy to explore advanced techniques. Whether it’s heavy-duty sewing or delicate embroidery‚ the Singer 99K’s compatibility with these tools ensures that every sewing project is executed with precision and ease‚ catering to both beginners and experienced sewists alike.

Adjusting Tension for Perfect Stitches

Proper tension adjustment is crucial for achieving consistent and professional-quality stitches with the Singer 99K sewing machine. The manual provides clear instructions for tuning the upper and bobbin thread tensions to suit various fabrics and stitch types. By carefully turning the tension dials and testing on scrap material‚ users can ensure balanced stitching‚ preventing issues like loose threads or puckering. Regular tension checks and adjustments help maintain optimal sewing performance. Always refer to the manual for specific guidelines on locating and adjusting tension controls‚ as these may vary slightly depending on the machine model. Proper tension ensures smooth operation and flawless results for every sewing project.

Customizing Your Sewing Experience

The Singer 99K sewing machine offers a variety of ways to tailor your sewing experience to your specific needs. With a range of attachments and accessories available‚ you can expand the machine’s capabilities to suit different projects. The manual provides detailed instructions on how to install and use these attachments‚ ensuring you can explore various sewing techniques. Additionally‚ the machine allows for easy customization of stitch length‚ width‚ and tension‚ giving you precise control over your work. By following the manual’s guidance‚ you can experiment with different fabric types and creative ideas‚ making every sewing project unique and personalized. This feature-rich design ensures versatility and adaptability‚ catering to both beginners and experienced sewists alike.

Maintenance and Care

Maintain your Singer 99K sewing machine by cleaning‚ lubricating‚ and storing it properly. Regular care ensures longevity and optimal performance‚ as detailed in the manual.

Cleaning the Machine Regularly

Cleaning your Singer 99K sewing machine regularly is essential to maintain its performance and longevity. Use a soft‚ dry cloth or brush to remove dust‚ lint‚ and debris from the exterior and internal parts. Pay special attention to the bobbin area‚ feed dogs‚ and stitch plate‚ as these areas tend to accumulate the most lint. Turn the handwheel manually to access the entire needle bar and hook area for thorough cleaning. Avoid using harsh chemicals or abrasive materials‚ as they may damage the machine’s finish. For stubborn stains‚ a slightly damp cloth can be used‚ but ensure the machine is dry before use. Regular cleaning prevents dust buildup‚ ensures smooth operation‚ and helps maintain the machine’s efficiency. This simple maintenance step is crucial for keeping your Singer 99K in optimal condition.

Lubrication and Oil Replacement

Proper lubrication is crucial for the smooth operation of your Singer 99K sewing machine. Use only Singer-branded oil or high-quality sewing machine oil to ensure compatibility and longevity. Apply a few drops of oil to the shuttle hook and bearings as indicated in the manual. Regular lubrication prevents friction‚ reduces wear on moving parts‚ and ensures consistent stitching. Oil the machine every 1-2 months or after extended use to maintain optimal performance. Avoid using household oils‚ as they may leave residue and damage the machine. After lubrication‚ run the machine without fabric to allow the oil to distribute evenly. This simple maintenance step ensures your Singer 99K runs smoothly and lasts for years. Always refer to the manual for specific lubrication points to avoid missing critical areas.

Storage Tips for Long-Term Use

Proper storage is essential to maintain the Singer 99K sewing machine’s condition and longevity. Before storing‚ clean the machine thoroughly using a soft cloth to remove dust and debris. Cover it with a high-quality dust cover or plastic bag to protect it from dust and moisture. Store the machine in a dry‚ cool place away from direct sunlight and humidity. Avoid basements or attics with extreme temperature fluctuations. Remove the bobbin and any remaining thread to prevent tangling. Store accessories separately in a protective case. Ensure the machine is oiled and the needle is removed to prevent rust. Periodically check the machine during storage to ensure it remains in good condition. Proper storage will help preserve the Singer 99K for future use and maintain its performance.

Troubleshooting Common Issues

This section addresses frequent challenges with the Singer 99K‚ such as thread breakage‚ tension problems‚ and machine jamming‚ providing practical solutions to ensure smooth operation.

Identifying and Solving Thread Breakage

Thread breakage is a common issue that can disrupt your sewing process. It is often caused by improper threading‚ incorrect tension settings‚ or using low-quality thread. To identify the problem‚ inspect the thread path and ensure it is threaded correctly according to the manual. Check for any knots or tangles in the thread. If the issue persists‚ adjust the tension dials to ensure proper balance. Using the correct needle size and type for your fabric can also prevent breakage. Regularly cleaning the machine and lubricating it can minimize friction‚ which may contribute to thread breakage. Always use high-quality thread suitable for your project to avoid frequent interruptions. By addressing these factors‚ you can resolve thread breakage and maintain smooth sewing operations.

Fixing Tension Problems

Tension issues can lead to uneven stitches or fabric pulling‚ disrupting your sewing experience. Start by checking the tension dials on your Singer 99K and ensure they are set appropriately for the fabric type. If the stitches are too tight or too loose‚ adjust the upper or lower tension accordingly. Incorrect needle size or thread type can also cause imbalance. Try re-threading the machine‚ making sure the thread follows the correct path without crossing. If problems persist‚ clean the tension discs to remove any lint or debris. For precise adjustments‚ refer to the manual or use the built-in tension gauge. Proper tension ensures consistent stitching and prevents fabric distortion‚ allowing you to achieve professional-quality results with ease. Regular maintenance and correct settings will keep your machine performing at its best.

Dealing with Machine Jamming

Machine jamming can be frustrating‚ but addressing it promptly ensures smooth operation. First‚ turn off and unplug the Singer 99K to avoid further damage; Gently remove any tangled fabric or thread‚ taking care not to force it‚ as this could harm the machine. Check for loose threads or debris inside the bobbin area and remove them carefully. If the jam persists‚ consult the manual for specific guidance on disengaging the needle or bobbin. Regular cleaning and proper threading can help prevent jams. Always use the correct needle size and fabric-appropriate settings to minimize the risk of machine jamming. By following these steps‚ you can restore your machine to optimal functioning and continue sewing seamlessly. Proper maintenance is key to preventing future issues and ensuring longevity.

This concludes the Singer 99K manual guidance‚ ensuring mastery and troubleshooting ease. Explore additional resources like official manuals and tutorials for enhanced sewing experiences and maintenance tips.

Final Tips for Optimal Machine Performance

Regularly clean and lubricate your Singer 99K to maintain smooth operation. Always use Singer-approved oils to prevent damage. Store the machine in a dry‚ cool place to avoid rust. For consistent stitching‚ ensure proper thread tension and use the correct needle type for your fabric. Refer to the manual for guidelines on handling different materials. Keep the bobbin area free from lint to prevent jams. Practice on scrap fabric before working on projects to ensure settings are correct. Explore additional resources like Singer’s official website or sewing communities for tips and troubleshooting. By following these guidelines‚ you’ll extend the life of your machine and achieve professional-quality results in your sewing projects.

Recommended Resources for Further Learning

For deeper mastery of the Singer 99K‚ explore Singer’s official website‚ which offers detailed guides‚ FAQs‚ and troubleshooting tips. Sewing communities and forums provide valuable insights and solutions from experienced users. Download the Singer 99K manual from trusted sources like ismacs.net for quick reference. Vintage sewing enthusiasts can find reproduction manuals‚ such as the 1957 Singer 99K/99-31 guide. Additionally‚ Singer’s lubrication guides ensure proper machine care. Spanish-speaking users can access manuals like the Singer 99K/99-31 in Spanish. Utilize these resources to enhance your sewing skills and maintain your machine effectively for years of reliable service.

Importance of Regular Maintenance

Regular maintenance is crucial for the Singer 99K sewing machine to ensure optimal performance and longevity. By following the manual’s guidelines‚ such as cleaning and lubricating the machine‚ you can prevent wear and tear. Singer recommends using their specialized lubricants for best results. Routine checks help identify potential issues early‚ avoiding costly repairs. Proper care extends the machine’s lifespan and maintains its efficiency. Consistent maintenance also enhances stitching quality and ensures smooth operation. Refer to the manual for detailed steps on cleaning‚ oiling‚ and storing the machine. Regular upkeep not only preserves your investment but also guarantees reliable performance for years of sewing projects.

g35 automatic to manual swap

The Infiniti G35‚ known for its powerful V6 engine‚ offers a thrilling driving experience․ Converting from automatic to manual transmission enhances driver control‚ engagement‚ and cost-efficiency․ This guide provides a comprehensive overview of the swap process‚ benefits‚ and considerations for enthusiasts seeking to upgrade their G35’s performance and driving dynamics․

Overview of the G35 Model

The Infiniti G35‚ produced from 2003 to 2008‚ is a rear-wheel-drive sports sedan and coupe known for its powerful VQ35DE 3․5L V6 engine․ It combines sleek styling‚ agile handling‚ and a luxurious interior‚ making it a favorite among driving enthusiasts․ The G35 is closely related to the Nissan 350Z‚ sharing many mechanical components․ Initially offered with an automatic transmission‚ the G35’s sporty nature has led many owners to explore manual transmission conversions․ This model’s performance potential‚ paired with its affordability‚ has made it a popular choice for modifications‚ including the sought-after automatic-to-manual swap․

Why Convert from Automatic to Manual Transmission?

Converting the G35 from automatic to manual transmission offers enhanced driving engagement and control․ Manual transmissions provide better fuel efficiency‚ lower maintenance costs‚ and improved performance․ Drivers gain direct control over gear shifts‚ enabling a more immersive driving experience․ Additionally‚ manual transmissions often last longer than automatics‚ reducing long-term repair expenses․ For enthusiasts‚ the manual swap is a way to personalize their vehicle‚ making it stand out while improving its sporty character․ This modification is particularly appealing to those seeking a more connected and rewarding driving experience‚ aligning with the G35’s performance-oriented design․

Benefits of a Manual Transmission Swap

A manual transmission swap for the G35 offers numerous advantages‚ including enhanced driver engagement and control․ Manual transmissions typically provide better fuel efficiency and lower long-term maintenance costs compared to automatics․ They also allow for more precise gear control‚ improving acceleration and performance․ Additionally‚ manual transmissions are often more durable and require less complex repairs․ For enthusiasts‚ the swap adds a sporty‚ personalized touch to the vehicle‚ making it more unique and aligned with its performance-oriented design․ Overall‚ the benefits of a manual transmission swap make it a rewarding upgrade for those seeking a more connected and cost-effective driving experience․

Understanding the G35 Transmission Systems

The G35 offers both automatic and manual transmission options‚ each designed for specific driving preferences․ This section explores their differences and functions to inform swap decisions effectively․

Differences Between Automatic and Manual Transmissions

Automatic transmissions offer ease of use‚ especially in heavy traffic‚ as they shift gears automatically without driver input‚ making them suitable for casual driving․ Manual transmissions‚ however‚ provide greater control over gear selection‚ enhancing driving engagement and performance․ They typically require more skill and effort‚ as drivers must operate a clutch pedal and manually shift gears․ Automatics are generally more expensive to maintain and repair‚ while manuals often offer better fuel efficiency and lower long-term costs․ The choice between the two depends on driving preferences‚ lifestyle‚ and the desired balance between convenience and driver involvement․ Each system has its unique advantages․

G35 Automatic Transmission Overview

The Infiniti G35 automatic transmission is a 5-speed RE5R05A unit‚ designed for smooth and seamless gear shifts․ It features electronic controls for optimal performance and includes a manual shift mode for driver input․ This transmission is well-suited for casual driving‚ offering ease of use in urban and highway conditions․ However‚ it lacks the direct driver engagement and fuel efficiency of a manual setup․ Over time‚ automatic transmissions can incur higher maintenance costs compared to manuals․ Despite its reliability‚ the automatic transmission’s limitations in performance and control have led many enthusiasts to consider a manual swap for enhanced driving dynamics and cost savings․

G35 Manual Transmission Overview

The G35 manual transmission‚ typically a 6-speed CD009 unit‚ offers precise control and enhanced driving engagement․ It is lightweight‚ durable‚ and designed for high-performance applications; This transmission is often sourced from the Nissan 350Z or other compatible models‚ making it a popular choice for swaps․ The manual setup provides better fuel efficiency‚ lower long-term maintenance costs‚ and superior acceleration compared to the automatic version․ However‚ it requires additional components like a clutch‚ flywheel‚ and modified driveshaft for proper installation․ The manual transmission is ideal for enthusiasts seeking a more connected and dynamic driving experience‚ though it demands more driver involvement and skill․

Compatibility of Manual Transmission with G35 Engine

The G35’s VQ35DE engine is fully compatible with a manual transmission‚ particularly the Nissan CD009 6-speed unit commonly used in swaps․ This engine-transmission pairing delivers improved power delivery and efficiency․ The manual transmission bolts directly to the engine with minimal modifications‚ ensuring a straightforward installation․ Key components like the pilot bearing‚ flywheel‚ and driveshaft must be adapted to ensure proper fitment․ The compatibility ensures smooth operation and optimal performance‚ making the swap a viable option for enhancing driving dynamics and responsiveness․ Proper alignment and component matching are essential to maintain reliability and maximize the benefits of the manual transmission setup․

Planning the Manual Transmission Swap

Assessing feasibility‚ identifying components‚ and estimating costs and time are crucial steps in planning a successful G35 automatic to manual transmission swap․

Assessing the Feasibility of the Swap

Evaluating the practicality of converting a G35 from automatic to manual involves checking compatibility‚ cost‚ and time․ Ensure the manual transmission and components like the flywheel‚ clutch kit‚ and driveshaft are compatible with the VQ35DE engine․ Budget for parts‚ tools‚ and potential labor costs․ Assess your mechanical expertise and access to specialized tools․ Consider the time required for disassembly‚ inspection‚ and reassembly․ Troubleshooting common issues like fluid leaks or gear engagement problems must also be planned․ While the swap is feasible‚ it demands careful planning and execution to avoid complications and ensure a smooth transition to manual driving․

Identifying Necessary Components for the Swap

Converting the G35 from automatic to manual requires specific components․ The manual transmission‚ compatible with the VQ35DE engine‚ is essential‚ along with a matching flywheel and clutch kit․ The driveshaft must be adjusted or replaced to fit the manual setup․ A shifter assembly‚ clutch pedal‚ and master/slave cylinders are also necessary․ Additionally‚ hydraulic lines‚ transmission mounts‚ and a pilot bearing are required․ Ensure the ECU is reprogrammed for manual operation․ Wiring harness modifications may be needed for clutch and gear position sensors․ Lastly‚ check for compatibility of the rear differential and consider upgrading bushings for better drivetrain stability․ OEM or aftermarket parts are recommended for reliability and performance․

Tools and Equipment Required

Performing a G35 automatic to manual swap requires specific tools and equipment․ Essential tools include wrenches‚ sockets‚ screwdrivers‚ and pliers for disassembly․ A transmission jack is crucial for safely handling the heavy transmission unit․ Specialized tools like a flywheel puller and clutch alignment tool are necessary for installing the manual components․ Additionally‚ a hydraulic press may be needed for pilot bearing installation․ Brake bleeding tools are required for the clutch hydraulic system․ Protective gear such as gloves and eyewear is recommended․ A drain pan and fluid disposal supplies are needed for handling transmission and hydraulic fluids․ Ensure access to a service manual or repair guide for detailed instructions and safety precautions during the swap․

Estimated Cost and Time for the Swap

The cost of a G35 automatic to manual swap can range from $4‚000 to $7‚500‚ depending on the source of the manual transmission and additional components needed․ A used transmission like the CD009 typically costs $1‚500 to $2‚500‚ while a new unit can exceed $3‚000․ Other expenses include the clutch kit‚ flywheel‚ driveshaft‚ and labor if hiring a professional․ The time required for the swap varies from 20 to 40 hours‚ depending on mechanical expertise․ DIY enthusiasts with experience may complete it in 20-30 hours‚ while novices might take longer․ Planning and sourcing parts in advance can help reduce delays and costs․

Preparing the Vehicle for the Swap

Drain fluids‚ disconnect the battery‚ and remove the automatic transmission․ Inspect and prepare the drivetrain for the manual setup․ Ensure all components are clean and ready for installation․

Draining Fluids and Disconnecting Battery

Begin by disconnecting the battery to prevent electrical complications․ Drain the automatic transmission fluid (ATF) and coolant to avoid spills during removal․ Use a drain pan to catch fluids‚ ensuring environmental safety․ Inspect the transmission pan and surrounding components for wear or damage․ Clean the area thoroughly to prepare for the manual transmission installation․ This step is crucial for a smooth swap and prevents contamination of new components․ Proper disposal of drained fluids is recommended․ Always follow safety guidelines when handling automotive fluids and electrical systems․

Removing the Automatic Transmission

Start by disconnecting the battery to ensure no electrical issues arise during the process․ Locate the transmission pan at the bottom of the automatic transmission and drain the fluid into a pan․ This step prevents messy spills and makes the removal cleaner․ Use jack stands or an engine hoist to securely support the engine‚ preventing it from shifting or dropping during transmission removal․

Disconnect the driveshaft‚ marking its position for proper realignment later․ Remove the transmission lines carefully to avoid fluid leakage․ Take out the torque converter‚ as it won’t be needed for the manual transmission․ Unbolt the transmission from the engine‚ ensuring not to strip any bolts‚ and carefully pull it away․ Remove the crossmember and mounts‚ supporting the transmission to prevent damage․ Finally‚ lift the transmission out‚ ensuring safety and clarity in the workspace․ Label and note all components for later reassembly․

Inspecting and Preparing the Drivetrain

After removing the automatic transmission‚ inspect the drivetrain for any wear or damage․ Ensure the rear differential is compatible with the manual transmission‚ as mismatched components can lead to poor performance․ Check the driveshaft and axles for damage or excessive play‚ as these may need replacement or adjustment․ Clean the drivetrain components thoroughly to remove dirt and old transmission fluid‚ ensuring a smooth installation process․ Additionally‚ verify that the driveshaft is properly balanced and aligned‚ as this is critical for the manual transmission’s operation․ Any issues found during inspection should be addressed before proceeding with the manual transmission installation to avoid future problems․

Installing the Manual Transmission

Mounting the manual transmission requires precise alignment and secure fastening․ Proper installation ensures smooth operation‚ with driveshaft and axles reconnected for optimal performance and reliability․

Mounting the Manual Transmission

Mounting the manual transmission involves aligning it with the engine and drivetrain․ Use a transmission jack to lift and position the unit carefully․ Ensure the pilot bushing is installed to guide the input shaft into the clutch․ Align the transmission mounting points with the chassis and secure it using the appropriate bolts․ Tighten all fasteners in the correct sequence to avoid misalignment․ Properly fastening the transmission ensures smooth operation and prevents damage to surrounding components․ Double-check the alignment before final tightening to guarantee a precise fit and optimal performance․

Connecting the Driveshaft and Axles

Connecting the driveshaft and axles is a critical step in the manual transmission swap․ Begin by ensuring the driveshaft is compatible with the manual transmission‚ as automatic and manual transmissions often have different spline counts and lengths․ Inspect the axles for wear and damage‚ replacing them if necessary․ Properly align the driveshaft with the transmission and differential‚ using alignment marks or tools to ensure accuracy․ Secure the driveshaft with the appropriate bolts and torque them to specifications․ Reconnect the axles to the hubs and transmission‚ ensuring they are fully seated and secured․ Finally‚ check for any vibrations or misalignment by test-driving the vehicle at low speeds․

Installing the Clutch and Flywheel

Installing the clutch and flywheel is a precise process that requires careful attention to detail․ Begin by inspecting the flywheel for any damage or wear and resurface it if necessary․ Install the new flywheel using the correct bolts and torque them to specifications․ Next‚ align and mount the clutch kit‚ ensuring the pressure plate and clutch disc are properly seated․ Use an alignment tool to center the clutch disc correctly․ Finally‚ connect the clutch slave cylinder to the transmission and bleed the hydraulic system to ensure proper engagement․ Proper installation ensures smooth clutch operation and prevents future issues․

Setting Up the Shifter and Linkage

Setting up the shifter and linkage is crucial for precise gear engagement․ Begin by installing the manual shifter assembly‚ ensuring it is securely mounted and aligned with the transmission․ Connect the shift linkages to the transmission and adjust them to achieve proper mechanical advantage․ Align the gear lever with the transmission’s gear selector fork‚ ensuring smooth and accurate shifting․ Tighten all bolts and connectors to factory specifications․ Finally‚ test the system by shifting through all gears to confirm proper engagement and operation․ Proper setup ensures a responsive and precise driving experience‚ making the manual swap worthwhile for enthusiasts seeking enhanced control․

Finalizing the Swap

Reconnect electrical systems‚ bleed clutch hydraulics‚ and refill transmission fluid․ Reconnect the battery‚ test the system‚ and ensure all components function properly before final inspection and test drive․

Reconnecting Electrical Systems

Reconnecting electrical systems is a critical step in the manual swap process․ Ensure all wiring harnesses are properly reconnected to the new manual transmission components․ The ECU must be updated to recognize the manual setup‚ and components like the reverse light switch and starter motor should be linked․ Use OEM-compatible connectors to maintain reliability․ Improper connections can lead to drivetrain issues or electrical faults․ Double-check all wiring before proceeding․ Once reconnected‚ test the system to ensure proper functionality․ If unsure‚ consult a professional to avoid potential damage or safety hazards․ Accurate reconnection is vital for optimal performance and reliability post-swap․

Bleeding the Clutch Hydraulics

Bleeding the clutch hydraulics is essential to ensure proper clutch engagement․ Start by using a clutch bleeding kit to remove air from the system․ Attach the kit to the clutch slave cylinder and pump the clutch pedal several times to circulate the fluid․ Repeat this process until the fluid flows freely without bubbles․ Use the correct type of brake fluid recommended for your G35․ If air remains in the system‚ it can cause spongy pedal feel or poor clutch engagement․ Once complete‚ test the clutch pedal to ensure a firm and responsive feel․ Proper bleeding ensures smooth operation of the manual transmission․

Refilling Transmission Fluid

Refilling transmission fluid is a critical step after installing the manual transmission․ Use the specified GL-4 gear oil to ensure compatibility with the G35’s manual gearbox․ Locate the transmission filler plug‚ typically found on the top or side‚ and use a fluid pump or funnel to pour in the required amount․ Refer to the manual or manufacturer’s guidelines for the correct fluid capacity․ Replace the filler plug securely and start the engine to circulate the fluid․ Check for leaks around the plug and test drive the vehicle to ensure smooth gear shifts․ Proper fluid levels are essential for optimal transmission performance and longevity․

Reconnecting the Battery and Testing

Reconnecting the battery is the final step before testing the manual transmission swap․ Ensure all electrical connections are secure and double-check for any loose wires․ Reconnect the negative terminal first‚ then the positive‚ to avoid sparks․ Start the engine and allow it to idle‚ observing the dashboard for any warning lights․ Test the clutch pedal feel and gear engagement․ Take the vehicle for a test drive in a safe area to ensure smooth shifting and proper transmission function․ Monitor for any unusual noises or behaviors․ If everything operates as expected‚ the swap is complete and the G35 is ready for manual driving enjoyment․

Troubleshooting Common Issues

Common issues after a G35 automatic to manual swap include leakages‚ gear engagement problems‚ and electrical or hydraulic malfunctions․ Addressing these requires thorough inspection and adjustments․

Addressing Leakages and Fluid Loss

Leaks and fluid loss are common issues post-swap‚ often originating from the transmission pan‚ drain plugs‚ or bellhousing․ Inspect all seals and gaskets for damage or improper installation․ Replace any faulty components and ensure all connections are tightened to factory specifications․ Fluid loss can lead to transmission damage‚ so monitor levels closely․ Use the correct GL-4 gear oil for manual transmissions and avoid overfilling․ If leaks persist‚ consider resealing the transmission or consulting a specialist․ Regular maintenance and thorough inspections can prevent these issues‚ ensuring optimal performance and longevity of the manual transmission system in your G35․

Fixing Gear Engagement Problems

Gear engagement issues after a manual swap often stem from improper clutch alignment or hydraulic system setup․ Ensure the clutch is properly installed and the master/slave cylinders are functioning correctly․ Adjusting the clutch pedal’s free play and bleeding the hydraulic system can resolve many problems․ Verify that the flywheel and pressure plate are correctly fitted․ If issues persist‚ consulting a specialist is recommended to ensure proper functionality and prevent further complications․ Regular maintenance and inspections are crucial to maintain smooth gear engagement in the G35 manual transmission swap․

Resolving Electrical or Hydraulic Issues

Electrical or hydraulic issues after a manual swap can arise from faulty sensors‚ wiring‚ or hydraulic leaks․ Check the clutch master and slave cylinders for proper function and ensure the hydraulic lines are sealed․ Verify the reverse light switch and neutral safety switch are connected correctly‚ as these are crucial for manual operation․ Inspect electrical connectors for damage or corrosion and replace any faulty components․ Bleeding the hydraulic system thoroughly can resolve spongy pedal issues․ If problems persist‚ consult a professional mechanic or refer to the factory service manual for detailed troubleshooting steps․ Proper diagnostics are key to restoring smooth functionality․

Adjusting the Clutch Pedal and Master Cylinder

Adjusting the clutch pedal and master cylinder is crucial for smooth operation after a manual swap․ Begin by ensuring the master cylinder is properly seated and connected to the clutch slave cylinder․ Inspect for any hydraulic leaks and tighten connections as needed․ Bleed the system thoroughly to remove air bubbles‚ which can cause a spongy pedal feel․ Adjust the pedal height and free play according to the manufacturer’s specifications for optimal engagement․ Test the clutch engagement by pressing the pedal and shifting through gears to ensure proper function․ Regular maintenance and precise adjustments will ensure reliable performance and prevent premature wear on components․

Post-Swap Maintenance and Care

Regular maintenance is essential after a manual swap․ Monitor clutch and transmission fluid levels‚ inspect for leaks‚ and schedule periodic inspections to ensure optimal performance and longevity․

Breaking in the New Clutch

Properly breaking in the new clutch is crucial for ensuring its longevity and performance․ Avoid aggressive driving for the first 500 miles‚ as this allows the clutch and flywheel to mate evenly․ Use gradual acceleration and avoid riding the clutch․ When stopping‚ downshift before coming to a complete stop to reduce wear․ Light‚ even engagement of the clutch pedal helps prevent premature wear․ This break-in period ensures the clutch facings seat properly‚ providing smooth and consistent engagement․ Proper care during this phase will maximize the lifespan of your manual transmission components․

Monitoring Transmission Fluid Levels

Regularly monitoring the transmission fluid level is essential for maintaining the health of your manual transmission․ Use a high-quality GL-4 gear oil‚ as specified in your owner’s manual․ Check the fluid level every 5‚000 to 7‚500 miles or during routine oil changes․ Locate the filler plug on the side of the transmission and use a socket wrench to remove it․ Insert the dipstick to measure the fluid level‚ ensuring it reaches the recommended mark․ Avoid overfilling‚ as this can lead to leaks and damage․ Always use the correct fluid type to prevent wear on synchronizers and gear components․

Scheduling Regular Maintenance

Regular maintenance is crucial for the longevity and performance of your manual transmission after the swap․ Schedule transmission fluid changes every 30‚000 to 60‚000 miles‚ depending on driving conditions․ Replace the transmission filter every 30‚000 miles to ensure optimal fluid flow․ Inspect the clutch and flywheel for wear every 15‚000 miles or when symptoms like slippage occur․ Check the axles and driveshaft for damage or excessive play annually․ Maintain proper alignment of the shifter and linkage to prevent misalignment issues․ Follow the manufacturer’s recommendations for lubricating moving parts‚ such as the shift linkage and clutch master cylinder․ Routine checks will help prevent costly repairs and ensure smooth operation․

Upgrading or Adjusting Components as Needed

After completing the manual swap‚ upgrading or adjusting components can further enhance performance and reliability․ Consider upgrading the clutch and flywheel for improved durability under heavy use․ Transmission mounts and bushings may need replacement to reduce vibration and ensure smooth shifting․ The driveshaft and axles should be inspected and upgraded if necessary to handle increased torque․ Additionally‚ the ECU may require reprogramming to optimize engine and transmission communication․ Brake pedals and master cylinders can be adjusted or upgraded for better feel and responsiveness․ Finally‚ consider lightweight components like aluminum driveshafts to improve power delivery․ Regular inspections and adjustments ensure everything functions seamlessly․

The G35 automatic to manual swap offers enhanced driving satisfaction and control‚ making it a rewarding project for enthusiasts willing to invest time and effort․

The G35 automatic to manual swap involves several key steps‚ starting with assessing feasibility and gathering necessary components like the transmission‚ flywheel‚ clutch‚ and driveshaft․ Mechanical modifications include removing the automatic transmission‚ installing the manual unit‚ and connecting the drivetrain․ Electrical and hydraulic systems‚ such as the shifter linkage and clutch hydraulics‚ must also be set up․ Post-swap tasks include bleeding the clutch system‚ refilling fluids‚ and testing the setup․ Proper planning‚ specialized tools‚ and attention to detail are crucial for a successful conversion․ Regular maintenance and monitoring are recommended to ensure longevity and performance․

Final Thoughts on the Benefits and Challenges

Converting the G35 from automatic to manual offers enhanced driver engagement and control‚ making it a rewarding modification for enthusiasts․ The process‚ however‚ presents challenges like significant time investment‚ specialized tools‚ and potential costs․ Success requires meticulous planning‚ proper parts selection‚ and skilled execution․ While the benefits of improved driving dynamics and mechanical connection to the car are substantial‚ careful consideration of personal skill level and resources is essential․ Ultimately‚ the swap can transform the G35 into a more responsive and enjoyable vehicle‚ provided challenges are met with thorough preparation and execution․

PDF

nurseinthemaking pdf

The Nurse in the Making PDF is a comprehensive digital guide designed to support nursing students in mastering essential skills and knowledge․ Trusted by over 300,000 students, it simplifies complex topics into easy-to-understand content, offering interactive tools and resources for effective learning․

Overview of the Guide

The Nurse in the Making PDF is a comprehensive resource tailored for nursing students, offering structured content to simplify complex topics․ Created by Kristine Tuttle, BSN, RN, it includes a 78-page digital guide, interactive tools, and study aids like flashcards and templates․ The guide covers essential nursing subjects, breaking them into digestible sections for effective learning․ Designed for both individual and bundle use, it supports students from foundational concepts to NCLEX prep․ Trusted by over 300,000 students, it ensures a manageable and successful journey through nursing school, providing clear, concise, and practical information to excel in clinical and academic settings․

Target Audience

The Nurse in the Making PDF is primarily designed for nursing students, aspiring nurses, and new graduate nurses seeking to master essential skills and knowledge․ It caters to those navigating the challenges of nursing school, from foundational concepts to NCLEX preparation․ The guide also supports clinical instructors and educators looking for structured resources to enhance teaching․ Its interactive tools and clear content make it ideal for self-directed learners and those needing additional support․ Whether you’re a student striving to succeed or a professional aiming to refine skills, this guide provides a comprehensive and accessible resource to aid in your nursing journey, ensuring confidence and competence․

Key Features of the 2025 Edition

The 2025 Edition of Nurse in the Making PDF offers enhanced content and tools tailored for modern nursing education․ It includes a Head-to-Toe Assessment Guide and a Dosage Calculation Clinical Pocket Guide, providing practical, hands-on resources․ The edition features Med Notes and an NCLEX Study Guide to aid exam preparation, along with a Pharmacology Study Guide for complex medication management․ Additionally, it incorporates motivational content to foster a strong nursing mindset․ Updated with the latest medical knowledge and interactive elements, this edition ensures nursing students and professionals have access to current, comprehensive, and user-friendly materials to excel in their studies and clinical practice․ These features make it an indispensable resource for achieving success in nursing education and beyond․

Key Components of the Nurse in the Making PDF

  • Head-to-Toe Assessment Guide
  • Dosage Calculation Clinical Pocket Guide
  • Med Notes and NCLEX Study Guide
  • Pharmacology Study Guide
  • Nursing Motivation and Mindset
  • Anatomy of a Super Nurse

These resources collectively provide a comprehensive toolkit for nursing students, covering clinical skills, exam preparation, and professional development․

Head-to-Toe Assessment Guide

The Head-to-Toe Assessment Guide is a detailed section of the Nurse in the Making PDF, providing a structured approach to patient evaluation․ It covers each body system, from neurological to cardiovascular, with clear visuals and checklists․ Designed to simplify complex assessments, this guide helps nursing students master systematic evaluation techniques․ Practical tools like mnemonics and flowcharts ensure comprehensive and organized patient care․ The guide emphasizes identifying normal and abnormal findings, enabling students to prioritize care effectively․ Its user-friendly format makes it an indispensable resource for clinical rotations and skills labs, fostering confidence in novice nurses․ This section is a cornerstone of the Nurse in the Making PDF, equipping students with the skills to conduct thorough and accurate assessments․

Dosage Calculation Clinical Pocket Guide

The Dosage Calculation Clinical Pocket Guide is a vital component of the Nurse in the Making PDF, designed to simplify medication dosage calculations․ Created by Kristine Tuttle, BSN, RN, it offers step-by-step methods, practice problems, and formulas to ensure accuracy․ This guide is particularly useful for nursing students and new graduates, providing clear, concise instructions for complex calculations․ Its organized format includes conversion factors, IV drip rates, and pediatric dosing, making it a go-to resource for clinical settings․ The guide emphasizes safety and precision, helping nurses master this critical skill with confidence․ Its portability and ease of use make it an essential tool for daily practice․

Med Notes and NCLEX Study Guide

Med Notes and NCLEX Study Guide is a key resource within the Nurse in the Making PDF, helping students master pharmacology and NCLEX preparation․ Designed by Kristine Tuttle, BSN, RN, it simplifies complex drug information, including side effects, uses, and nursing implications․ The guide also includes NCLEX-style practice questions, tips, and strategies to boost exam confidence․ Trusted by over 300,000 students, it offers concise, organized content that makes studying efficient and effective․ This tool is essential for both classroom success and preparation for the NCLEX-RN exam, ensuring students are well-equipped to handle real-world clinical scenarios and achieve their nursing goals․

Pharmacology Study Guide

The Pharmacology Study Guide is a cornerstone of the Nurse in the Making PDF, offering a clear and concise breakdown of essential drug information․ Designed to simplify complex pharmacology concepts, it includes detailed drug monographs, side effects, and nursing implications․ Interactive tools like flashcards and practice questions enhance learning, while organized content ensures easy reference․ This guide aligns with NCLEX exam topics, helping students master pharmacology for both classroom success and clinical application․ By focusing on practical, real-world scenarios, it equips future nurses with the knowledge to administer medications safely and confidently, making it an indispensable resource for nursing education․

Nursing Motivation and Mindset

The Nursing Motivation and Mindset section of the Nurse in the Making PDF is designed to inspire and empower nursing students to stay focused and resilient․ Created by Kristine Tuttle, BSN, RN, this guide acknowledges the challenges of nursing school and offers encouraging words to help students push through difficult times․ With clean, simple, and informative content, it provides tips for maintaining a positive mindset and managing stress․ This resource emphasizes the importance of perseverance and self-care, reminding students that their hard work will pay off․ It’s a motivational companion that helps aspiring nurses build confidence and stay committed to their goals, fostering a strong foundation for success in their nursing journey․

Anatomy of a Super Nurse

Anatomy of a Super Nurse is a dedicated section within the Nurse in the Making PDF, focusing on the essential qualities and skills required to excel in nursing․ This guide emphasizes the importance of clinical expertise, critical thinking, and compassionate care․ It provides practical advice on developing a strong work ethic, effective communication, and decision-making abilities․ Written in plain, accessible language, it offers insights into the mindset and practices of successful nurses․ The section also highlights the significance of continuous learning and resilience, encouraging students to embrace challenges and grow professionally․ By breaking down the attributes of a “super nurse,” it serves as a motivational and educational tool for aspiring nurses․

How Nurse in the Making Helps with Nursing School Challenges

Nurse in the Making simplifies complex nursing topics, offers interactive tools for engagement, and provides structured organization to ease the learning process, making nursing school more manageable․

Simplifying Complex Nursing Topics

The Nurse in the Making PDF excels at breaking down intricate nursing concepts into clear, digestible content․ It addresses challenging subjects like pharmacology, dosage calculations, and clinical assessments through straightforward explanations and visual aids․ By organizing information in an intuitive manner, the guide helps students grasp key ideas without overwhelming them․ Practical examples and concise summaries further enhance understanding, making even the most complex topics approachable․ This approach not only boosts confidence but also equips future nurses with the foundational knowledge needed for success in both academic and clinical settings․ The guide’s simplicity is a testament to its effectiveness in demystifying nursing education․

Interactive Tools for Effective Learning

The Nurse in the Making PDF incorporates interactive tools designed to enhance engagement and retention․ Flashcards, video tutorials, and laminated templates provide hands-on learning experiences, making complex topics more manageable․ The guide’s digital format allows for easy navigation, while its concise summaries and practice questions reinforce key concepts․ These tools cater to various learning styles, ensuring that students can grasp information effectively․ By combining visual, auditory, and kinesthetic approaches, the guide fosters a deeper understanding of nursing principles․ This interactive approach not only simplifies learning but also prepares students for real-world clinical scenarios, making it an invaluable resource for nursing education․

Structured Learning and Organization

The Nurse in the Making PDF is meticulously organized to ensure a logical flow of information, catering to nursing students’ needs․ The guide is divided into clear sections, such as fundamentals, health assessment, and pharmacology, making it easy to navigate․ Each topic is broken down into concise, digestible chapters, complete with visual aids like charts and diagrams․ The inclusion of laminated templates and cheat sheets further enhances organization, allowing students to practice and review key concepts systematically․ This structured approach helps students prioritize their studying, ensuring they cover all essential areas efficiently․ The digital format also enables easy searching and referencing, making study sessions more productive and focused․

The Creator Behind Nurse in the Making

Kristine Tuttle, BSN, RN, created the Nurse in the Making PDF after struggling in nursing school․ She developed clean, simple study guides to help students succeed, impacting over 300,000 learners․

Kristine Tuttle, BSN, RN

Kristine Tuttle, a dedicated Registered Nurse, is the creator of the Nurse in the Making PDF․ During her nursing school journey, she faced significant challenges, prompting her to develop her own study guides․ Her resources quickly gained popularity for their clarity and effectiveness, helping over 300,000 nursing students․ Kristine’s mission is to simplify complex nursing concepts, making education more accessible and manageable for aspiring nurses․ Her guides, including the Nurse in the Making PDF, have become indispensable tools for students, offering structured learning and practical insights․ Kristine’s dedication to nursing education has left a lasting impact on the nursing community․

Her Journey in Nursing School

Kristine Tuttle’s journey in nursing school was marked by initial struggles, which inspired her to create her own study guides․ Frustrated by the complexity of nursing topics, she decided to break them down into simpler, more digestible content․ This personal challenge led to the development of resources that not only helped her but also thousands of other students․ Her journey from struggling student to successful nurse and educator highlights her commitment to improving nursing education․ This experience laid the foundation for the Nurse in the Making PDF, a tool now trusted by over 300,000 students worldwide․

Development of Study Guides

Kristine Tuttle created her study guides after struggling in nursing school, recognizing the need for simpler, more organized resources․ Her guides were designed to be clean, informative, and easy to understand, focusing on breaking down complex nursing concepts․ These resources quickly gained popularity, helping over 200,000 students manage their studies more effectively․ The guides cover essential topics like medication calculations, head-to-toe assessments, and pharmacology, providing students with practical tools for success․ Tuttle’s approach emphasizes clarity and accessibility, making her study guides indispensable for nursing students seeking to master challenging subjects․ Her work has become a cornerstone for nursing education, trusted by thousands worldwide․

The Complete Nursing School Bundle

The Complete Nursing School Bundle offers a comprehensive collection of study guides, flashcards, and resources tailored for nursing students․ It includes essential tools like the Head-to-Toe Assessment Guide, Dosage Calculation Guide, and Pharmacology Study Guide, all designed to simplify complex topics and support academic success․ This bundle is a cost-effective solution, providing students with everything they need to excel in nursing school and prepare for the NCLEX exam․ Trusted by thousands, it’s a must-have resource for aspiring nurses․

What’s Included in the Bundle

The Complete Nursing School Bundle includes a wide range of resources tailored to meet the needs of nursing students․ It features the Head-to-Toe Assessment Guide, which provides a detailed framework for conducting thorough patient assessments․ Additionally, the bundle contains a Dosage Calculation Clinical Pocket Guide, offering step-by-step instructions for accurate medication calculations․ The Med Notes and NCLEX Study Guide is also included, helping students master pharmacology and prepare for the NCLEX exam․ Other components include a Pharmacology Study Guide, Nursing Motivation and Mindset resources, and The Anatomy of a Super Nurse, all designed to simplify complex topics and enhance learning․

Benefits of the Bundle

The Complete Nursing School Bundle offers numerous benefits for nursing students, providing a one-stop resource for success․ It simplifies complex topics through organized guides, saving time and reducing stress․ The bundle includes tools for clinical preparation, dosage calculations, and NCLEX review, ensuring comprehensive coverage of essential skills․ Interactive and easy-to-use, it supports both classroom learning and hands-on clinical practice․ Additionally, the bundle is digitally accessible, allowing students to study anytime and anywhere․ Its structured approach helps students stay organized, while the included motivation resources foster resilience and confidence․ This holistic package is designed to empower nursing students to excel academically and clinically․

How to Access the Bundle

Accessing the Complete Nursing School Bundle is straightforward and convenient․ The bundle is available as a digital download, ensuring instant access to all resources․ Students can purchase and download the bundle directly from the Nurse in the Making website or through platforms like Google Drive․ Once purchased, the bundle is delivered via email, allowing immediate access to PDF guides, study tools, and interactive resources․ Additionally, free US shipping is offered for physical products, making it easy for students to choose their preferred format․ The bundle is also regularly updated, with new content available for download at no extra cost, ensuring students always have the latest materials․

NCLEX Exam Preparation with Nurse in the Making

The NCLEX Cram Guide and practice questions provide focused preparation, while structured study schedules ensure a comprehensive approach to mastering exam content and building confidence․

NCLEX Cram Guide

The NCLEX Cram Guide is a concise yet comprehensive resource designed to help nursing students efficiently prepare for the NCLEX exam․ It focuses on high-yield topics and essential nursing concepts, ensuring students grasp critical information quickly․ The guide includes practice questions, key mnemonics, and strategies to tackle challenging questions․ By condensing complex topics into easily digestible content, it helps students save time while reinforcing their understanding․ Available as a free download, the NCLEX Cram Guide is a valuable tool for last-minute review and confidence building․ It complements other study materials, making it an indispensable asset for exam success․

Practice Questions and Resources

The Nurse in the Making PDF includes an extensive collection of practice questions designed to simulate real NCLEX exam scenarios․ These questions cover a wide range of nursing topics, from pharmacology to medical-surgical care․ Additionally, the guide provides detailed rationales for each answer, helping students understand their mistakes and improve their knowledge․ Alongside the questions, the guide offers supplementary resources such as flashcards, video tutorials, and study templates․ These tools enhance learning and retention, making it easier for students to identify weak areas and focus their study efforts effectively․ The combination of interactive and traditional study materials ensures a well-rounded preparation for the NCLEX exam․

Study Schedule and Online Resources

The Nurse in the Making PDF includes a structured study schedule to help nursing students organize their preparation effectively․ This schedule is tailored to cover all essential topics, ensuring a balanced and efficient study plan․ Additionally, the guide provides access to online resources, such as digital downloads, interactive tools, and supplementary study materials․ These resources are available through platforms like Google Drive, making it easy for students to access them anytime, anywhere․ The 2025 edition also includes updated content and links to online communities for peer support and discussion․ This comprehensive approach ensures that students have everything they need to succeed in nursing school and beyond․

Using Nurse in the Making for New Nurses

The Nurse in the Making PDF supports new nurses by facilitating a smooth transition into clinical practice, offering practical tools like the Clinical Pocket Guide and fostering ongoing professional growth․

Transitioning from School to Practice

The Nurse in the Making PDF bridges the gap for new nurses transitioning from academia to clinical practice․ It provides practical tools like the Clinical Pocket Guide, which offers 300 pages of essential content for simulations, skills labs, and real-world applications․ The guide ensures new graduates are well-prepared for patient care, medication administration, and critical thinking․ Additionally, resources like the Pharmacology Study Guide and Med Notes help reinforce foundational knowledge, while interactive tools such as dosage calculation guides and head-to-toe assessment checklists enhance confidence and competence․ By focusing on continuous learning and professional development, the guide supports new nurses in navigating the challenges of their first roles effectively․

Clinical Pocket Guide for New Grad Nurses

The Clinical Pocket Guide for New Grad Nurses is a must-have resource designed to ease the transition into clinical practice․ Part of the 2025 Edition of the Nurse in the Making series, this guide offers 300 pages of concise, need-to-know content tailored for simulations, skills labs, and real-world clinical scenarios․ It covers essential topics like dosage calculations, head-to-toe assessments, and pharmacology, providing a quick reference for critical tasks․ The guide is particularly valuable for new grad nurses, as it helps bridge the gap between theoretical knowledge and practical application․ Its portable format ensures accessibility, making it an indispensable tool for navigating the challenges of clinical practice with confidence and competence․

Continuous Learning and Professional Development

The Nurse in the Making PDF emphasizes the importance of continuous learning and professional development for nurses at all stages of their careers․ Beyond nursing school, the guide provides resources like interactive tools, study guides, and video tutorials to help nurses stay updated on best practices and advancements in healthcare․ The 2025 Edition includes expanded content to support lifelong learning, ensuring nurses can adapt to evolving patient needs and industry standards․ By fostering a mindset of ongoing education, the guide equips nurses with the skills and confidence to excel in their roles, whether transitioning into practice or advancing their careers․

Customer Testimonials and Success Stories

Over 300,000 nursing students trust Nurse in the Making, with testimonials praising its clear guides and essential resources that boost confidence and success in nursing school․

Stories from Nursing Students

Thousands of nursing students have shared their success stories, attributing their progress to Nurse in the Making․ Many highlight how the guides simplified complex topics, making studying manageable․ One student shared, “I bought her guides, and I’m doing so well!” Others praise the resources for helping them excel in exams and clinical settings, proving the guides’ impact on their nursing journeys․ These testimonials reflect the guide’s effectiveness in empowering students to succeed, reinforcing its reputation as an indispensable tool for nursing education․

Impact on Nursing Education

The Nurse in the Making PDF has revolutionized nursing education by bridging gaps in traditional learning․ Its structured content and visual aids empower students to grasp complex concepts effortlessly․ Created by nurses for nurses, it addresses real-world challenges, enhancing both theoretical and practical understanding; This guide has become a cornerstone for modern nursing education, fostering confidence and competence in future healthcare professionals․

Customer Satisfaction and Reviews

Customers praise the Nurse in the Making PDF for its clarity, organization, and effectiveness․ Many nursing students report improved understanding and confidence after using the guide․ Testimonials highlight its ability to simplify complex topics, making it a “game-changer” for exam prep and clinical skills․ Users appreciate the clean design and ease of use, calling it a “must-have” for nursing school․ Kristine Tuttle’s passion for creating accessible resources shines through, earning consistent 5-star ratings; The guide’s impact on reducing study stress and fostering success has solidified its reputation as a trusted tool in nursing education․

  • 95% of users recommend it to fellow nursing students․
  • Students praise its ability to break down difficult concepts․
  • Many call it a “lifesaver” for NCLEX prep and clinical rotations․

Digital Accessibility and Ease of Use

The Nurse in the Making PDF is optimized for mobile devices, ensuring easy access on-the-go․ Its interactive elements, like hyperlinks and bookmarks, enhance navigation and efficiency․

PDF Format and Compatibility

The Nurse in the Making PDF is seamlessly accessible in digital format, ensuring compatibility with multiple devices, including desktops, tablets, and smartphones․ The PDF file is optimized for easy viewing and navigation, with features like bookmarks and hyperlinks to facilitate quick access to specific sections․ This format allows nursing students to study on-the-go, making it an ideal resource for busy schedules․ Additionally, the PDF can be downloaded and stored on cloud platforms like Google Drive, ensuring accessibility from anywhere․ Its universal compatibility and user-friendly design make it a practical tool for nursing education, catering to diverse learning preferences and environments․

Free US Shipping on Products

Nurse in the Making offers free US shipping on all physical products, providing added convenience for nursing students․ This perk ensures that essential study guides, flashcards, and other resources reach students promptly without extra costs․ Combined with the digital accessibility of the PDF guides, this service enhances the overall value for aspiring nurses․ The free shipping option is part of the commitment to make nursing education more affordable and accessible, allowing students to focus on their studies without financial burdens․ This benefit, along with the comprehensive content, makes Nurse in the Making a preferred choice for nursing students across the United States․

Bundle and Save Options

Nurse in the Making offers a Bundle and Save option, allowing students to purchase multiple resources at a discounted rate․ This option provides significant savings, with discounts of up to 20% off the total price when buying the Complete Nursing School Bundle․ The bundle includes essential guides like the Head-to-Toe Assessment Guide, Dosage Calculation Clinical Pocket Guide, and Pharmacology Study Guide, ensuring students have everything they need for success․ By bundling products, students can access comprehensive tools while reducing costs, making their nursing education more affordable and manageable․ This option is particularly beneficial for those seeking a one-stop solution for all their study needs․

The Nurse in the Making PDF is a trusted, comprehensive guide simplifying complex nursing topics for over 300,000 students, offering interactive tools for effective learning and future updates to support aspiring nurses seamlessly․

Final Thoughts on Nurse in the Making

The Nurse in the Making PDF stands out as a transformative resource for nursing students, offering a clear, concise, and interactive approach to mastering complex topics․ Created by Kristine Tuttle, BSN, RN, this guide has empowered over 300,000 students by breaking down challenging concepts into digestible content․ Its comprehensive coverage, including NCLEX prep and clinical tools, ensures students are well-prepared for both classroom and real-world challenges․ The guide’s digital accessibility and constant updates make it a reliable companion for aspiring nurses․ With glowing testimonials and a focus on continuous learning, Nurse in the Making is more than a study aid—it’s a gateway to nursing success․

Future Updates and Expansions

The Nurse in the Making PDF is continually evolving to meet the needs of nursing students․ Future updates will expand content areas, such as advanced pharmacology and critical care, while introducing new interactive tools like quizzes and simulations․ The 2025 edition has already added 78 digital pages, and upcoming versions aim to incorporate more visual aids and real-world case studies․ Additionally, the guide will explore emerging topics like mental health nursing and gerontology․ These updates ensure the resource remains relevant and comprehensive, helping students stay ahead in their nursing education and preparation for the NCLEX exam․

Encouragement for Aspiring Nurses

Nursing school is challenging, but with the right mindset and tools, success is within reach․ The Nurse in the Making PDF encourages aspiring nurses to embrace resilience and determination, emphasizing that every obstacle is an opportunity to grow stronger․ Kristine Tuttle, the creator, shares her own journey of struggle and triumph, inspiring students to stay motivated․ The guide reminds future nurses of the profound impact they will have on patients’ lives, urging them to stay focused and committed․ By leveraging the resources provided, aspiring nurses can overcome challenges and thrive in their educational and professional journeys, shaping the future of healthcare with compassion and excellence․

PDF

mercedes sprinter warning lights meaning pdf

Mercedes Sprinter warning lights are essential indicators of your van’s health‚ ensuring safety and proper vehicle maintenance․ These lights communicate potential issues‚ from engine troubles to safety alerts‚ helping you address problems promptly and avoid further damage․ Understanding their meanings is crucial for optimal performance and driver safety; This guide will help you decipher these symbols and take appropriate actions to maintain your Mercedes Sprinter in top condition․

1․1 Overview of Dashboard Warning Lights

The Mercedes Sprinter dashboard features various warning lights that indicate the vehicle’s status and potential issues․ These lights are categorized by color‚ with red signaling critical issues like engine overheating or low oil levels‚ yellow for less urgent matters such as AdBlue level or glow plug concerns‚ and blue for safety features․ Each light corresponds to specific systems‚ ensuring timely awareness and appropriate actions to maintain vehicle health and safety․ Understanding these indicators is vital for proactive maintenance and secure driving experiences․

1․2 Importance of Understanding Warning Lights

Understanding Mercedes Sprinter warning lights is crucial for maintaining vehicle performance and safety․ Ignoring these indicators can lead to severe mechanical damage or safety risks․ Recognizing the meaning of each light ensures timely repairs‚ prevents costly breakdowns‚ and keeps you and your passengers safe․ Regular checks and prompt responses to illuminated warnings help extend the vehicle’s lifespan and maintain its reliability․ Familiarizing yourself with these symbols is essential for responsible vehicle ownership and optimal driving conditions․

Common Mercedes Sprinter Warning Lights

Mercedes Sprinter features various dashboard warning lights‚ categorized by color‚ indicating vehicle status and potential issues․
Red lights signal critical issues like engine temperature and oil levels․
Yellow lights indicate less urgent concerns like AdBlue or glow plugs․
Blue lights signify features like high beams․

2․1 Red Warning Lights

Red warning lights in the Mercedes Sprinter indicate critical issues requiring immediate attention․
These include the engine temperature warning‚ signaling overheating‚ and the oil level warning‚ pointing to low oil․
The brake system warning light also appears red‚ indicating potential brake failure or issues․
These lights should never be ignored‚ as they can lead to severe damage or safety risks if not addressed promptly․
Always stop the vehicle and consult the manual or a professional if a red light appears․

2․2 Yellow Warning Lights

Yellow warning lights on the Mercedes Sprinter indicate less urgent but important issues that require attention․
Examples include the AdBlue warning‚ signaling low fluid levels‚ and the glow plugs light‚ which illuminates during engine startup․
The air filter warning also appears yellow‚ indicating a potential blockage․
Addressing these issues promptly can prevent more severe problems and maintain your van’s performance and efficiency․
Consult the owner’s manual or a technician for guidance if a yellow light persists․

2․3 Blue Warning Lights

Blue warning lights on the Mercedes Sprinter are typically associated with advanced driver-assistance systems․
Examples include lights for active distance assist or lane-keeping assist‚ indicating system activation or deactivation․
These lights ensure safe driving by monitoring surroundings and assisting the driver․
If a blue light flashes‚ it may signal a system malfunction or require driver input․
Such notifications help maintain safety and driving comfort‚ ensuring the vehicle operates smoothly with modern technology features․

Red Warning Lights Explained

Red warning lights indicate critical issues requiring immediate attention‚ such as engine overheating or low oil levels‚ to prevent severe damage and ensure safety while driving․

3․1 Engine Temperature Warning Light

The engine temperature warning light signals that your Mercedes Sprinter’s engine is overheating․ This red icon illuminates when the coolant temperature exceeds safe levels‚ indicating potential damage․ Immediate action is necessary to prevent engine failure․ Pull over safely‚ turn off the engine‚ and let it cool․ Check for coolant leaks‚ a malfunctioning thermostat‚ or a faulty radiator fan․ Addressing this issue promptly ensures your van’s longevity and avoids costly repairs․ Always refer to your owner’s manual for specific guidance․

3․2 Oil Level Warning Light

The oil level warning light alerts you when your Mercedes Sprinter’s engine oil is low․ This red light indicates a critical issue that requires immediate attention to prevent engine damage․ Pull over safely‚ turn off the engine‚ and check the oil level using the dipstick or electronic sensor․ Add the recommended oil if levels are low․ If the light persists‚ seek professional assistance to avoid severe engine damage․ Ignoring this warning can lead to costly repairs‚ so act promptly to ensure your van’s longevity․

3․3 Brake System Warning Light

The brake system warning light illuminates when there’s an issue with your Mercedes Sprinter’s brakes․ This red light could indicate low brake fluid levels‚ worn brake pads‚ or a fault in the ABS system․ If the light appears‚ check the brake fluid level and inspect for worn components․ Driving with this light on can compromise safety․ If the issue persists‚ avoid driving and have your vehicle inspected by a professional to ensure proper brake function and prevent potential accidents․

Yellow Warning Lights Explained

Yellow warning lights on your Mercedes Sprinter indicate issues that require attention but are not immediately critical․ They alert you to monitor or address potential problems to prevent more severe damage․

4․1 AdBlue Warning Light

The AdBlue warning light in your Mercedes Sprinter signals that the AdBlue fluid level is low․ AdBlue is a vital component in reducing emissions‚ and when levels drop‚ your engine may not start․ Ensure you refill the tank promptly to maintain emissions compliance and prevent engine issues․ Ignoring this warning can lead to system malfunctions‚ so it’s essential to address it as soon as possible to keep your vehicle running smoothly and efficiently․

4․2 Glow Plugs Warning Light

The Glow Plugs Warning Light in your Mercedes Sprinter illuminates when the ignition is turned on and should extinguish after a short period․ If the light remains lit‚ it indicates a potential issue with the glow plug system‚ which could prevent the engine from starting‚ especially in colder conditions․ Immediate servicing is recommended to avoid further complications and ensure proper engine performance․ This light is crucial for maintaining your van’s reliability and operational efficiency․

4․3 Air Filter Warning Light

The Air Filter Warning Light in your Mercedes Sprinter indicates a potential issue with the air filter system․ If illuminated‚ it suggests the air filter may be clogged or dirty‚ restricting airflow to the engine․ This can lead to reduced performance‚ decreased fuel efficiency‚ or even engine stalling․ It is essential to inspect and replace the air filter as needed to maintain optimal engine function and prevent further complications․ Regular maintenance of the air filter ensures your van runs smoothly and efficiently․

Airbag and ABS Alerts

Airbag and ABS alerts on your Mercedes Sprinter indicate critical safety system issues․ The airbag light signals a fault in the airbag system‚ while the ABS light points to brake system malfunctions․ Both are vital for your safety and should be addressed immediately to prevent potential risks while driving․

5․1 Airbag Warning Light

The airbag warning light in your Mercedes Sprinter illuminates when there’s a fault in the airbag system․ This could be due to faulty sensors‚ wiring issues‚ or a malfunctioning airbag module․ If the light stays on‚ it means the airbag system may not deploy in an accident‚ compromising your safety․ It’s crucial to have this checked by a certified technician immediately to ensure proper functionality and your protection on the road․

5․2 ABS Warning Light

The ABS warning light in your Mercedes Sprinter indicates a problem with the Anti-lock Braking System․ This system prevents wheel lock-up during hard braking‚ ensuring better control and safety․ If the light appears‚ it could mean issues with ABS sensors‚ wiring‚ or low brake fluid levels․ Continuing to drive with this light on may compromise braking performance․ It’s essential to inspect the brake system and visit a certified technician to resolve the issue promptly and maintain your vehicle’s safety features․

How to Diagnose Sprinter Warning Lights

Diagnosing Mercedes Sprinter warning lights involves a systematic approach․ Start with a visual inspection of fluid levels and basics like the gas cap․ Consult the owner’s manual for specific light meanings and potential causes․ If issues persist‚ use diagnostic tools or visit a certified technician to ensure accurate troubleshooting and proper repairs‚ maintaining your vehicle’s performance and safety․ This methodical process helps identify and resolve problems efficiently․

6․1 Visual Inspection of the Vehicle

Begin diagnosing Sprinter warning lights with a visual inspection․ Check the gas cap‚ oil‚ coolant‚ and AdBlue levels․ Ensure all reservoirs are filled adequately․ Look for loose connections or signs of leaks․ Verify that all dashboard lights illuminate when the ignition is turned on‚ as some systems perform self-tests․ This initial check can often resolve minor issues‚ such as a loose gas cap causing a warning light․ It’s a simple yet effective first step in identifying potential problems․ Regular inspections can prevent more severe faults from developing․

6․2 Consulting the Owner’s Manual

Consulting the owner’s manual is a crucial step in understanding warning lights․ The manual provides detailed explanations of each symbol‚ helping you identify potential issues․ It often includes troubleshooting guides and maintenance schedules․ For the Mercedes Sprinter‚ the manual may also offer QR codes linking to video tutorials or additional resources․ Referencing the manual ensures you take the correct actions‚ whether it’s checking fluid levels or restarting the engine after repairs․ This resource is invaluable for DIY diagnostics and maintaining your vehicle’s health․

Practical Examples of Warning Light Issues

This section provides real-world examples of warning light issues‚ such as the Glow Plugs light indicating a starting problem and the AdBlue light signaling low fluid levels․

7․1 Glow Plugs Warning Light Example

The Glow Plugs warning light illuminates when the diesel engine’s preheating system malfunctions․ For instance‚ if the light remains on after turning the ignition key to position 2‚ it signals a potential issue with the glow plugs or the system’s electrical circuit․ In colder conditions‚ this can prevent the engine from starting․ Immediate action is required‚ such as checking the dashboard for additional error codes and consulting a professional mechanic to diagnose and repair the faulty components before further damage occurs․

7․2 AdBlue Warning Light Example

The AdBlue warning light appears when the fluid level is low‚ indicating the need for a refill․ For example‚ if the light illuminates while driving‚ it signals that the AdBlue tank is nearly empty․ Ignoring this can lead to reduced engine performance or even a complete shutdown․ Drivers should refill the AdBlue tank promptly and‚ if the light persists‚ consult a technician to ensure the SCR system is functioning correctly and emissions remain within legal standards․

What to Do When a Warning Light Appears

When a warning light appears‚ stop safely and assess the situation․ Consult the owner’s manual for specific guidance․ For example‚ if the Glow Plugs light stays on or the AdBlue warning is illuminated‚ take immediate action to avoid further issues․

8․1 Immediate Actions to Take

When a warning light appears‚ stop your Mercedes Sprinter in a safe location․ Turn off the engine and engage the parking brake․ Check for obvious issues like a loose gas cap or low fluid levels․ If the light indicates a critical system failure‚ such as the engine overheating‚ do not continue driving․ Consult the owner’s manual for guidance or contact a professional mechanic to avoid further damage․

8․2 Scheduling a Service Appointment

If a warning light persists‚ consult the owner’s manual for guidance and contact a Mercedes-Benz service center․ Schedule an appointment promptly to ensure the issue is diagnosed and repaired by certified technicians․ Regular maintenance is key to preventing major repairs and ensuring your Sprinter operates reliably․ Always refer to the Mercedes-Benz Sprinter 2019 PDF manual for detailed instructions and recommendations on servicing intervals․

Importance of Regular Maintenance

Regular maintenance is crucial for preventing issues and ensuring your Mercedes Sprinter operates reliably․ It helps avoid costly repairs‚ extends lifespan‚ and includes routine checks of fluids and filters․

9․1 Preventative Measures to Avoid Warning Lights

Adopting preventative measures can significantly reduce the occurrence of warning lights in your Mercedes Sprinter․ Regular fluid checks‚ such as engine oil and AdBlue levels‚ ensure proper vehicle function․ Monitoring air filter cleanliness and ensuring the gas cap is secure are simple yet effective steps․ Additionally‚ staying updated with scheduled services and promptly addressing minor issues can prevent major faults․ These practices not only maintain your van’s performance but also enhance safety and reliability on the road․

9․2 Routine Checks for Fluid Levels and Filters

Routine checks for fluid levels and filters are vital for maintaining your Mercedes Sprinter’s health․ Regularly inspect engine oil‚ coolant‚ and AdBlue levels to ensure they are within recommended ranges․ A dirty air filter can trigger warning lights and reduce performance‚ so clean or replace it as needed․ Checking these components helps prevent issues before they escalate‚ ensuring smooth operation and minimizing the risk of warning lights appearing on your dashboard․

Mercedes Sprinter 2019 PDF Manual Guide

The Mercedes Sprinter 2019 PDF manual provides detailed operating instructions‚ including hazard light controls‚ exterior lighting settings‚ and essential maintenance guidelines․ Access it online or via the app for comprehensive vehicle management․

10․1 Accessing the Operating Instructions Manual

The Mercedes Sprinter 2019 operating instructions manual is accessible online through Mercedes-Benz’s official website and app․ It can also be found in printed form within the vehicle’s document wallet․ This manual provides detailed information on various features‚ including hazard warning lights‚ exterior lighting controls‚ and maintenance schedules․ Additionally‚ it offers guidance on troubleshooting warning lights and understanding their meanings‚ ensuring you can address issues efficiently․ Regularly reviewing the manual helps in maintaining your vehicle’s optimal performance and safety standards․

10․2 Key Features of the 2019 Sprinter Manual

The 2019 Mercedes Sprinter manual is a comprehensive guide offering detailed explanations of dashboard warning lights‚ operating instructions‚ and maintenance tips․ It includes sections on exterior lighting controls‚ hazard warning light functions‚ and troubleshooting steps for common issues․ The manual also covers environmental notes and material damage warnings‚ ensuring responsible vehicle ownership․ With clear symbols and practical advice‚ it serves as an essential resource for optimizing your Sprinter’s performance and addressing any concerns effectively․ Regular reference to this manual enhances driving safety and overall vehicle longevity․

Evolution of Warning Lights in Mercedes Sprinter

Mercedes Sprinter warning lights have evolved from basic symbols to advanced digital systems‚ enhancing driver awareness and safety through clearer notifications and modern technology advancements over the years․

11․1 Historical Development of Dashboard Symbols

The dashboard symbols in Mercedes Sprinter have undergone significant transformations since their introduction in the 1990s․ Initially‚ simple analog indicators were used to signal basic functions like oil levels and temperature․ Over the years‚ these symbols evolved to include more detailed digital representations‚ offering clearer and more specific information․ Modern systems integrate advanced technologies‚ such as LED lights and touchscreen displays‚ providing real-time data and enhancing driver understanding․ This evolution reflects the broader trend of technological advancement in automotive design․

11․2 Advancements in Warning Light Technology

Modern Mercedes Sprinter warning lights leverage cutting-edge technology‚ featuring LED displays and touchscreen interfaces for enhanced clarity․ These systems now integrate seamlessly with advanced driver-assistance features like ABS and airbag monitoring․ Real-time data synchronization enables precise fault detection‚ while multicolor LEDs differentiate between critical and minor issues․ Additionally‚ many models offer voice command interaction and smartphone app integration‚ providing drivers with instant alerts and detailed diagnostics․ These innovations ensure a safer and more informed driving experience․

Common Faults and Solutions

Common faults in Mercedes Sprinter include issues like low AdBlue levels‚ malfunctioning glow plugs‚ and brake system warnings․ Solutions often involve checking fluid levels‚ replacing faulty components‚ and consulting the owner’s manual for guidance․

12․1 Frequently Occurring Issues

Frequently occurring issues in Mercedes Sprinter vans include low AdBlue levels‚ faulty glow plugs‚ and brake system warnings․ These problems often trigger specific warning lights on the dashboard․ Low AdBlue levels can prevent engine start‚ while malfunctioning glow plugs may cause difficulty starting the engine in cold conditions․ Brake system warnings indicate potential safety risks․ Regular maintenance‚ such as checking fluid levels and inspecting glow plugs‚ can help prevent these issues․ Consulting the owner’s manual or a professional is recommended for persistent problems․

12․2 DIY Solutions for Minor Faults

For minor faults‚ DIY solutions can save time and money․ Loose gas caps or low fluid levels often trigger warning lights‚ which can be resolved by tightening or refilling․ AdBlue warnings can be addressed by refilling the tank․ Resetting the warning lights after minor repairs is also possible using diagnostic tools․ However‚ always consult the owner’s manual for guidance․ If unsure‚ seeking professional help is advisable to avoid further damage․ Regular checks can prevent minor issues from escalating into major problems․

Troubleshooting Tips

Use diagnostic tools to identify fault codes and consult the owner’s manual for guidance․ Perform visual inspections of fluids and connections․ Reset warning lights after repairs if issues are resolved․ Regular checks can help prevent unexpected problems and ensure smooth operation of your Mercedes Sprinter․

13․1 Using Diagnostic Tools

Diagnostic tools are essential for identifying the root cause of warning lights in your Mercedes Sprinter․ An OBD-II scanner can retrieve fault codes‚ providing specific information about the issue․ Multimeters can measure electrical currents to detect faulty sensors or wiring․ Additionally‚ consulting the owner’s manual or online resources can help interpret codes and guide repairs․ These tools enable precise troubleshooting‚ saving time and money by addressing problems efficiently․ Regular use of diagnostic tools ensures your Sprinter operates smoothly and safely․

13․2 Resetting Warning Lights After Repairs

After resolving the issue causing a warning light‚ reset the light to ensure it turns off․ Use an OBD-II scanner to clear fault codes or follow manual reset procedures in the owner’s manual․ For some lights‚ turning the ignition to position 2 and waiting can reset the system․ If the light persists‚ consult the manual or a technician to ensure the repair was successful․ Proper resetting confirms the issue is resolved and prevents unnecessary alerts․

Understanding Mercedes Sprinter warning lights is crucial for maintaining vehicle health and safety․ Regular checks and prompt repairs ensure optimal performance and prevent potential damages․ Stay informed!

14․1 Summary of Key Points

14․2 Final Thoughts on Vehicle Maintenance

Regular maintenance is key to extending your Mercedes Sprinter’s lifespan and ensuring reliability․ Stay vigilant about warning lights‚ as they signal potential issues before they escalate․ Schedule routine checks for fluids‚ filters‚ and tires to prevent unexpected breakdowns․ Always consult the owner’s manual or a certified technician for guidance․ By prioritizing proactive care‚ you’ll enhance safety‚ performance‚ and longevity‚ keeping your Sprinter in optimal condition for years to come․ Consistent upkeep is an investment in both your vehicle and your peace of mind․

corvette c6 manual

The Corvette C6 manual serves as an essential guide, providing detailed insights into the car’s features, maintenance, and performance capabilities, ensuring optimal ownership and driving experiences.

Overview of the Corvette C6

The Corvette C6, produced from 2005 to 2013, is a sixth-generation model known for its sleek design, lightweight materials, and enhanced performance. It features a hydroformed steel frame and an aluminum chassis, reducing weight while maintaining strength. The C6 is powered by a robust 6.0L or 6.2L V8 engine, delivering impressive horsepower and torque. Available in coupe and convertible body styles, it offers a blend of luxury and raw power. The interior boasts improved fit and finish compared to its predecessor, with modern amenities like a touchscreen infotainment system. Handling is refined, making it suitable for both daily driving and track use. The C6 Corvette remains a sought-after choice for enthusiasts, offering a balance of performance, style, and affordability in the used car market.

Importance of the Owner’s Manual

The owner’s manual for the Corvette C6 is a vital resource for understanding and maintaining the vehicle. It provides essential information about the car’s features, operation, and maintenance requirements, ensuring owners can maximize performance and longevity. By following the manual’s guidelines, drivers can identify potential issues early, such as fluid checks and clutch maintenance, preventing costly repairs. It also covers critical systems like the starter relay and electrical components, helping owners troubleshoot common problems. The manual serves as a comprehensive guide for both everyday driving and track use, ensuring safety and optimal performance. It is a cornerstone for responsible ownership, helping drivers make informed decisions about their Corvette C6. Regularly referencing the manual ensures a smooth and enjoyable driving experience.

Performance and Handling

The Corvette C6 delivers exceptional performance and handling, combining powerful engine options with precise steering and responsive suspension, ensuring a thrilling and controlled driving experience always.

Engine Specifications and Power Output

The Corvette C6 features a powerful LS2 6.0-liter V8 engine, producing 400 horsepower and 400 lb-ft of torque. For enhanced performance, the LS7 7.0-liter V8 is available, delivering 505 horsepower and 470 lb-ft of torque. Both engines are paired with a six-speed manual or automatic transmission, ensuring smooth power delivery. The LS2 achieves 0-60 mph in 4.2 seconds, while the LS7 accelerates in just 3.5 seconds. The engines utilize variable valve timing and a high-compression design for optimal efficiency and power. Drivers can expect impressive fuel economy for a high-performance vehicle, with the LS2 achieving up to 26 mpg on the highway. The C6’s engine lineup is designed to balance raw power with everyday drivability, making it a versatile choice for both track enthusiasts and casual cruisers. Regular maintenance, as outlined in the manual, ensures sustained performance and longevity.

Transmission Options: Manual vs. Automatic

The Corvette C6 offers two transmission choices: a six-speed manual and a six-speed automatic with paddle-shift capability. The manual transmission provides precise control and a more engaging driving experience, ideal for enthusiasts who value performance and connection with the vehicle. It features a short-throw shifter and a performance-oriented gear ratio setup. The automatic option, while slightly heavier, offers convenience and ease of use, particularly in traffic-heavy urban environments. It also includes a manual mode, allowing drivers to switch gears when desired. Both transmissions are well-suited for the C6’s powerful engine options, delivering smooth acceleration and responsive performance; The manual transmission is preferred by purists for its direct feel, while the automatic appeals to those seeking comfort without sacrificing driving excitement. Each option enhances the overall driving experience, catering to different preferences and driving conditions. Regular maintenance, as detailed in the manual, ensures optimal functionality for both systems.

Handling and Suspension Setup

The Corvette C6 features a refined suspension system designed to deliver exceptional handling and stability. The base model comes with a tuned suspension that balances comfort and performance, while the optional Z51 Performance Package offers stiffer springs, larger anti-roll bars, and performance-tuned dampers for enhanced cornering capabilities. The C6’s steering is precise and responsive, providing drivers with confidence on both straight roads and winding curves. The suspension setup ensures excellent traction and control, making the car highly agile for its class. Regular inspections of suspension components, such as bushings and shocks, are recommended to maintain optimal performance. Proper maintenance, as detailed in the manual, ensures the Corvette’s handling remains predictable and responsive, whether on daily drives or track days. This balance of comfort and agility solidifies the C6’s reputation as a versatile sports car.

Maintenance and Servicing

Regular maintenance is crucial for the Corvette C6’s longevity. The manual outlines essential checks, fluid changes, and inspections to ensure optimal performance and prevent potential issues.

Fluid Checks and Changes

Regular fluid checks are vital for maintaining the Corvette C6’s performance and longevity. The manual recommends inspecting engine oil, coolant, transmission, and brake fluids. Engine oil should appear clean and free of debris, while coolant levels must be checked to prevent overheating. Transmission fluid ensures smooth gear shifts, and brake fluid is critical for safety. Clutch fluid, often overlooked, should also be monitored for consistency and color. Proper fluid maintenance prevents premature wear and potential system failures. Always refer to the manual for specific guidelines and intervals for fluid changes. Neglecting these checks can lead to costly repairs and compromised performance. Regular inspections help identify issues early, ensuring the car runs efficiently and reliably over time.

Clutch Maintenance Tips

Proper clutch maintenance is crucial for the Corvette C6’s manual transmission system. Regular inspections ensure optimal performance and prevent unexpected failures. The manual advises checking the clutch fluid level regularly, as low levels can lead to spongy pedal feel or complete loss of clutch engagement. Replacing the clutch master and slave cylinders is recommended every 30,000 to 50,000 miles to maintain precise control. Bleeding the clutch system annually helps remove air bubbles that can cause inconsistent pedal response. Additionally, avoiding aggressive driving habits, such as riding the clutch, can significantly extend the lifespan of the clutch components. Always use high-quality replacement parts to ensure reliability and performance. By following these tips, drivers can enjoy smooth, precise shifting and minimize the risk of costly repairs. Regular maintenance also enhances the overall driving experience, keeping the Corvette C6 in peak condition.

Inspecting for Wear and Tear

Regular inspections are vital to maintaining the Corvette C6’s performance and longevity. Owners should check for signs of wear on suspension components, such as cracked bushings or worn ball joints, which can affect handling. Tires should be inspected for uneven wear patterns, as this may indicate alignment issues. Brake pads and rotors should also be examined for excessive wear, as they are critical for safety. Electrical systems, including the starter relay and wiring, should be checked for damage or corrosion. Additionally, inspecting the condition of belts, hoses, and other rubber components ensures they are free from cracks or degradation. Regularly reviewing these areas helps prevent unexpected failures and maintains the car’s optimal performance. Addressing issues early can save time and money, ensuring the Corvette C6 remains in excellent condition for years to come.

Common Issues and Fixes

Common issues with the Corvette C6 include overheating during track use, starter relay failures, and clutch system wear. Regular maintenance and prompt repairs can resolve these problems effectively.

Overheating Problems in Track Conditions

The Corvette C6, particularly when driven aggressively on tracks, can experience overheating issues due to high engine strain. This problem was notably severe in the C7 Z06, leading to legal actions against GM, but the C6 also requires attention in extreme conditions. Inspecting and maintaining the cooling system is crucial to prevent overheating. Regular checks of the radiator, hoses, and coolant levels are essential. Upgrading to a high-performance radiator or installing an auxiliary cooling kit can enhance heat management. Additionally, ensuring proper airflow through the front grille and cleaning debris from the cooling vents can improve efficiency. While these modifications help mitigate the issue, they may not entirely resolve it. Monitoring temperature levels during track use remains vital to avoid engine damage.

Starter Relay and Electrical Systems

The Corvette C6’s starter relay is a critical component of its electrical system, responsible for activating the starter motor. Issues with the starter relay can prevent the engine from starting, often accompanied by a clicking sound when pressing the start button. To diagnose, place your fingers on the starter relay in the underhood fuse block and have someone press the start button to check for a clicking response. If no click is heard, the relay may be faulty and needs replacement. Additionally, ensuring all electrical connections are clean and secure is vital for reliable operation. Regular maintenance of the battery and charging system is also recommended to avoid electrical-related problems. Addressing these issues promptly helps maintain the overall performance and longevity of the Corvette C6’s electrical systems.

Modifications and Upgrades

The Corvette C6 offers extensive modification opportunities, including engine enhancements, suspension upgrades, and aerodynamic improvements, allowing owners to tailor performance and aesthetics to their preferences.

Engine Modifications for Enhanced Performance

Engine modifications for the Corvette C6 can significantly boost power and efficiency. Upgrading the air intake and exhaust systems improves airflow, increasing horsepower. Installing a high-performance camshaft enhances torque and RPM range. Additionally, aftermarket engine tuning and ECU remapping optimize fuel injection and ignition timing for maximum performance. For more extreme gains, superchargers or turbochargers can be added, though they require careful integration with the engine’s cooling and fuel systems. These modifications not only enhance acceleration but also provide a more responsive driving experience, making the C6 a formidable performer on both the road and the track. Proper installation and tuning by experts are crucial to ensure reliability and longevity of the engine.

Suspension Upgrades for Better Handling

Suspension upgrades are a key way to enhance the Corvette C6’s handling, making it more responsive and stable during aggressive driving. Replacing the stock suspension with adjustable coilovers allows for fine-tuning of ride height, damping, and stiffness, catering to specific driving styles. Upgrading to stiffer sway bars reduces body roll, improving cornering precision. Additionally, polyurethane bushings provide better chassis rigidity compared to stock rubber components. These modifications not only improve track performance but also enhance everyday driving dynamics. For optimal results, consider pairing suspension upgrades with lightweight wheels and high-performance tires. Proper installation and alignment by a professional are essential to ensure safety and maximize the benefits of these upgrades, delivering a more refined and capable driving experience.

Buying Guide

When purchasing a used Corvette C6, prioritize checking the vehicle’s history, mileage, and maintenance records. Look for any signs of wear, damage, or needed repairs to ensure a reliable buy. Always test drive the car to assess performance and handling, and consider having a mechanic inspect it before finalizing the purchase. Negotiate based on findings to secure the best possible price, ensuring the car meets your expectations and budget. A thorough evaluation will help you make an informed decision and avoid costly surprises down the road.

What to Look for When Purchasing a Used C6

When buying a used Corvette C6, inspect the exterior and interior for any signs of damage or wear. Check the paint condition, look for dents or scratches, and ensure all trim and emblems are intact. Inside, examine the seats, dashboard, and carpets for stains or tears. Test all electronic features, including the infotainment system, to ensure they function properly. Review the vehicle’s maintenance history and service records to confirm regular upkeep. Inspect the engine bay for leaks or corrosion, and check the fluid levels, including oil, coolant, and transmission fluid. Look for any signs of overheating, as this has been a known issue in some models. A pre-purchase inspection by a mechanic can reveal hidden problems. Finally, take the car for a test drive to assess its performance and handling. This thorough evaluation will help you make an informed decision and avoid costly surprises.

Negotiating the Best Price

When negotiating the price of a used Corvette C6, research the market value to determine a fair range; Inspect the car thoroughly, noting any flaws or needed repairs, and use these as bargaining points. Highlight any high-mileage concerns or outdated maintenance to justify a lower offer. Request service records to verify the car’s history and ensure no hidden issues. If the seller is unwilling to budge, consider walking away to demonstrate your willingness to compromise. Be polite but firm in your negotiations, and don’t hesitate to seek a second opinion or professional inspection for leverage. A well-prepared approach can help you secure a deal that aligns with your budget and expectations. Patience and persistence are key to achieving a satisfactory agreement.

Manual vs. Automatic Transmission

The Corvette C6 offers both manual and automatic transmissions, each catering to different driving preferences and needs, ensuring a tailored experience for every driver.

Pros and Cons of Manual Transmission

The manual transmission in the Corvette C6 offers a more engaging driving experience, allowing for precise control over gear shifts and enhancing the connection between driver and car. It typically provides better fuel efficiency compared to automatic transmissions and is often preferred by enthusiasts for its sporty feel. However, it requires more driver effort, especially in heavy traffic, and may not be as convenient for daily commuting. Maintenance costs can also rise due to the need for clutch replacements over time. Despite these drawbacks, the manual transmission remains a popular choice for those seeking a more hands-on driving experience.

Advantages of Automatic Transmission

The automatic transmission in the Corvette C6 offers ease of use, making it ideal for daily driving and long road trips. It provides smooth gear shifts without requiring manual intervention, reducing driver fatigue in heavy traffic. The automatic option is also more accessible for new drivers or those who prefer a hassle-free driving experience. Additionally, it often includes features like manual mode, allowing drivers to switch between automatic and manual shifting for added control when desired. This versatility makes the automatic transmission a practical choice for commuters while still delivering the car’s signature power and performance. Its appeal lies in balancing convenience and capability, catering to a broader range of drivers.

Driver Experience and Safety

The Corvette C6 prioritizes driver experience with ergonomic design and advanced safety features, ensuring comfort and protection while delivering exceptional performance and handling capabilities on the road.

Handling Capabilities and Safety Features

The Corvette C6 excels in handling, offering precise control and stability through its well-tuned suspension system. Safety features include advanced airbags, anti-lock brakes, and traction control, enhancing driver and passenger protection. These elements combine to provide a secure and exhilarating driving experience, making the C6 a standout in its class.

Driver Comfort and Ergonomics

The Corvette C6 prioritizes driver comfort with its ergonomic design, featuring adjustable seats and intuitive controls for a personalized driving experience. The improved fit and finish enhance interior quality, while the manual transmission offers smooth shifting for effortless control. Visibility is excellent, and the seating provides adequate support for both casual and spirited driving. However, some owners note that the seats could offer better lateral support during aggressive cornering. Overall, the C6 balances performance and comfort, ensuring a satisfying drive.

The Corvette C6 manual offers a blend of performance, style, and practicality, making it a satisfying choice for enthusiasts, while its minor quirks remain manageable for dedicated owners.

Final Thoughts on the Corvette C6 Manual

The Corvette C6 manual is a comprehensive guide that empowers owners to maximize their driving experience. It covers essential maintenance routines, performance optimization, and troubleshooting tips, ensuring longevity and satisfaction.

With its detailed insights into engine specifications, transmission options, and handling setups, the manual caters to both novice and experienced drivers. It also addresses common issues like overheating problems and electrical system reliability, providing practical solutions.

While the C6 may have minor drawbacks, its overall balance of power, style, and practicality makes it a standout choice. Owners appreciate the manual’s clarity, which fosters a deeper connection with the vehicle;

Future Prospects for the Corvette C6

The Corvette C6 remains a sought-after model, with its performance and styling continuing to appeal to enthusiasts. As newer Corvette generations emerge, the C6 holds its value well, making it a smart investment for collectors and drivers alike.

Its robust V8 engine and agile handling ensure it stays relevant in the sports car market. Additionally, the availability of aftermarket modifications allows owners to enhance its capabilities further, keeping the C6 competitive.

Looking ahead, the C6 is likely to become a classic, with its reputation as a reliable and exhilarating ride solidifying its place in automotive history. Enthusiasts can expect sustained interest and strong resale values, making the C6 a timeless choice for years to come.